Niches from the tiles in the bathroom. Niches in the bathroom: stylish evolution
There is no doubt that the niche in the bathroom is very practical and has many advantages. Obviously, storing accessories is more reliable than in other places. Bottles with shampoos, soap and other accessories will no longer stand on the floor or on the sides of the bath. Niche will solve these problems, and there are many options how to equip a niche in the bathroom.
Colors and materials
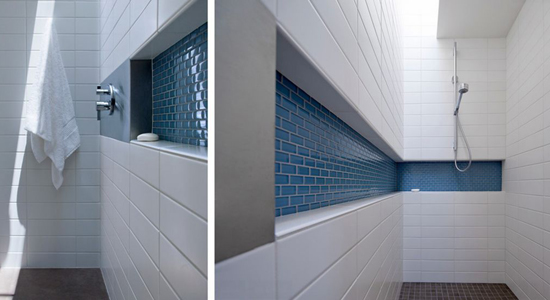
The niche can, if desired, make a large and even enclosing the bathroom. Successfully looks in such solutions tile of contrasting color. For example, a combination of white and blue is very refreshing to the interior.

Practical solutions

Build niches in the bathroom is simple, but you need to think carefully about their design. It is important to choose the right height to avoid getting up on chairs, reaching out for the right thing, and also it should be safe and accessible to children.

Based on the size of the bathroom is selected and the size of the niche. The variant can be small, only with two compartments. Measure the height of the bottles with the shampoos that you are going to store in the niche, so that it does not turn out that they do not enter it.

If the bathroom is combined with a shower room, then the niche will be all the more practical. Place it so that you can reach it easily by taking a bath or washing in the shower. Horizontal design is appropriate here.
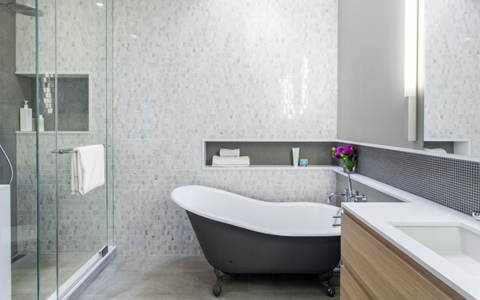
Niches in the bathroom do not only near the shower. You can place a niche both above the bathroom and in front of the sink. This design is appropriate everywhere.
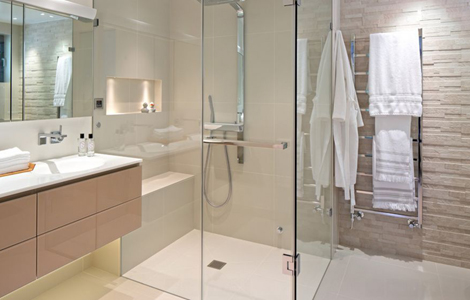
Usually in the niche have three shelves, not two. So the appearance wins, and more space is created for the storage of detergents. This niche fits well with the situation. All decoration can be done in one style.
Variants of niches

Niches provide an opportunity to fantasize in creating an interior. You can use decorative tiles, make it a visual accent, combine with other details in the bathroom. Welcome and bold color solutions, a combination of different materials, anything that will please the eye.
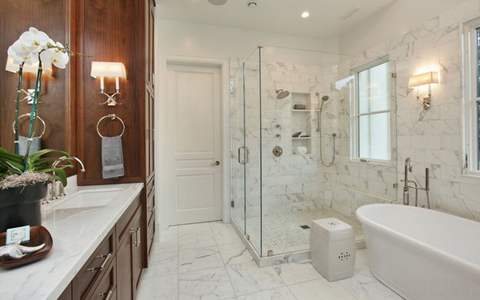
In the bathroom, symmetry can reign. Glass will divide the space into two zones, one of which is a shower without a door. A niche will focus on the adjacent wall.
To emphasize the niche, you can use directional lighting. It is both comfortable and beautiful, and makes the shower room stylish and finished. But the design should be simple and concise.
The case with niches in the bathroom is not as simple as it seems at first glance. Any changes in the size, materials and position of the shelves affect the functionality and style. What to choose - glass or stone? How much to set the shelves and how to arrange them? This article will help you make the right decisions.
In accordance with the rule of the golden section, the niche, divided in proportion to one to two, looks very good.
Tip: Most types of glass have a green tint. If you prefer glass shelves with a white tint, buy glass for them with a low content of iron molecules.
In this example, the niche shelves are made of stone. What do you like? The glass looks more elegant than a stone, but if the niche regularly gets water and soap foam, it will quickly become slovenly. On the stone surface, stains and soap spots are not so noticeable. 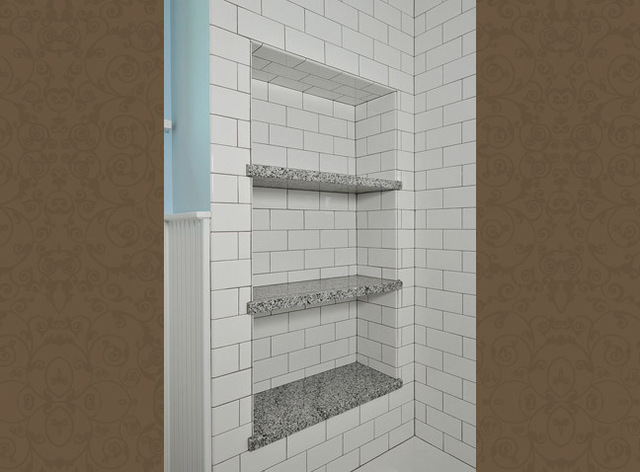
Tip: Install the shelves and the bottom wall of the recess so that they are slightly tilted outward. So from them will drain excess water. If water constantly accumulates in a niche, it will quickly lose its original appearance.
The design of the niche often depends on the choice of tiles for the bathroom. For finishing the niche, the tile usually has to be cut off frequently and carefully processed so that the slices and joints look neat. Here is an example of a complex trimming of tiles when decorating a niche. The upper niche of a larger size is divided by an original luminous glass shelf. 
Tip: Some types of decorative glass are easily scratched, so with such shelves you need to handle them carefully and use gentle cleaning methods for them.
Groups from an odd number of objects in the bathroom look better than an even number of details. The proportions of this niche are ideal. On the back wall there are eleven rows of tiles. The glass shelf is set at the level of the seventh row from above and divides the niche in a ratio of one to two. In another place, this asymmetry might not look very appropriate, but in this case it looks great. 
Tip: Mark the position of the shelves so that they fit all the accessories. Even if the niche smoets well, but it does not fit a bottle of your favorite shampoo, it will be of little use.
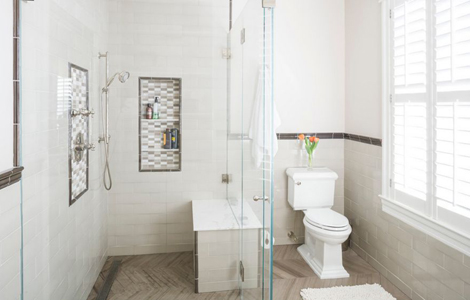
If there is a bench in your bathroom, organize a niche so that you and your children can reach out to the necessary things while sitting on the bench.

Tip: If you have children, then the shelves in the niche should be secured as reliably as possible, in case your fidget tries to use them as steps, trying to get the objects lying at the top. If you fix the shelves before laying the tiles, they will stay more secure than those pasted into the already finished niche.
What a magnificent detail! This bright corner pedestal immediately attracts attention. Plan the design of the bathroom so that the niche does not compete with the main decorative elements. In this example, glass shelves give the niche a delicate, elegant look.

Tip: It is usually easy to find the glass for shelves of the right quality and size. However, foresight can not be superfluous. If there are three shelves in your niche, order four glass canvases, in case something breaks or breaks.
In this sample, the niche space was rationally used. In a small compartment to fit a lot of small gizmos, and on a spacious upper shelf - bottles with shampoos and lotions. 
Tip: For wide shelves, get a hardened durable glass that can withstand the weight of the items placed on it and will not break from accidental impact.
In this picture, the niche, highlighted by a contrasting frame, looks very good. It is built into the half-wall and is hidden behind it from the rest of the bathroom. Such a decision will have to be liked by those who do not like to display their bath accessories. 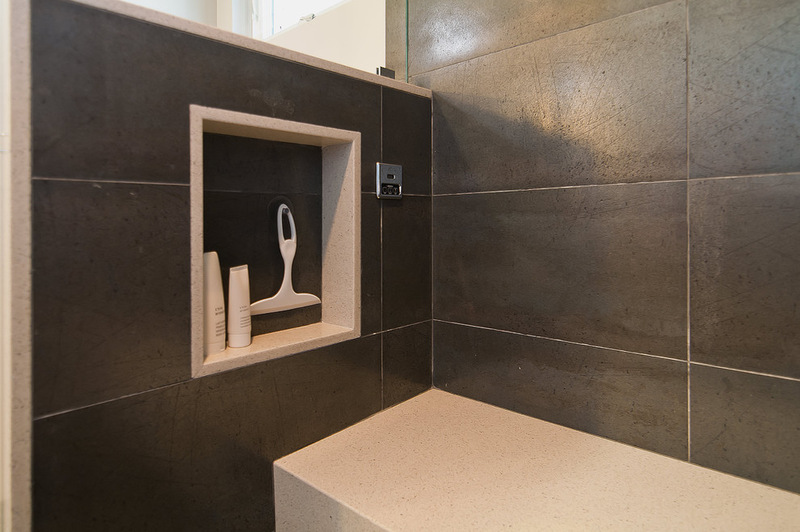
Tip: If the niche is in a prominent place, try to arrange it as best as possible.
The large luminous niche in this image is divided in a ratio of one to two. A small shelf is recessed deep into the niche, so water does not enter it. This is the most suitable place for a soap dish. 
Tip: If you use thick stone plates as shelves, they should be carefully sanded off both the front and back sides.
Recently, it is very common to use gypsum cardboard for repairs in the apartment, offices and offices. With the help of this unpretentious material, which is very easy to install, you can beautifully and uniquely decorate the room, develop your own design interior.
In addition, there is a waterproof plasterboard that is capable of retaining moisture. Therefore, it is often used even when creating such a design as niche of plasterboard in the bathroomroom.
This material is often made of shelves, niches from plasterboard for a compartment compartment. This arrangement helps to save space in the room. You can correctly think over where to put shelves and niches, which will save space. Not all furniture can be selected for the necessary dimensions of the room.
In addition to saving space, you can save yourself and your material resources, since every man can mount such niches independently, without hiring specialists.
Choose the right tools and materials
To do this, you need to buy the following tool and material:
· Punch (drill);
· Mounting adhesive;
· Drywall;
· Profile;
· Knife for drywall;
· Reinforcing tape;
· Self-tapping screws;
· Screwdriver (drill);
· When conducting lighting or lighting, wiring and light bulbs.
Stages of work

1. Layout
2. Installation of the frame from the metal profile
3. Sheeting with sheets of plasterboard
4. Putty and leveling
5. Painting
6. Installation of bulbs
So, first of all, you need to mark out a pencil for the future installation of the profile. It is desirable to check the level of compliance drawing to all walls. That after installation it was not found out, that some niches will be curves. Some schemes can be seen on photo and video in the Internet.
After the marking is done, the metal guide profile is taken and fixed to the wall with self-tapping screws. After that, the profile guides to the floor begin to be fastened, and if the niche should reach the ceiling, then later the profile guides to the ceiling are attached. Then the main profile is also fastened with self-tapping screws.
After checking the installed profiles for a good fixation, you can begin to fasten the sheets of gypsum board, which are pre-cut to the required size.

If it is planned to carry out lighting, before installing the drywall, it is necessary to lay the wiring, install a transformer for LED bulbs. Also, do not forget about grounding. Holes for light bulbs are also more convenient to make in advance.
It is desirable that the self-tapping screws are slightly drowned in the plasterboard, as they will look ugly when filling with putty, it will not be an even coating.
It is also necessary to monitor the smooth seams, especially in the corners. That there are no cracks between the sheets.
The third stage of work - putty, which begins exclusively from the corners of the niche. On top of the reinforcing tape, which is laid at the seams, putty is applied along the entire perimeter.
After drying, the tape is removed, and the niche shpaklyuetsya second layer. Then the entire structure is treated with a finishing coat, painted or applied a special emulsion.
If additional illumination was provided, the final step would be to install the light bulbs in the pre-prepared holes. The choice of lighting for today will help to realize any desire of the owners. They come in different colors and shapes, which can change the entire room lighting, give it a twist, make it cozy and unique.
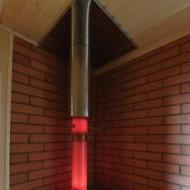
This bathroom design Oksana Balamatyuk expressed a winter mood: here and the glass with frosty patterns, and a flaming fireplace, and as if the ice furniture. So it's more pleasant to look at this project on a hot summer day.
- 1 of 1
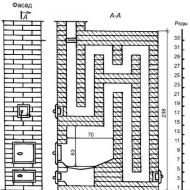
On the picture:

Plan of the room.

- 1 of 1
On the picture:
A picture of a niche in the bathroom where the fireplace is built.
A fairly spacious bathroom (5,5 x 3,3 m) gives a good time and imagination. Frost and heat, ice and flame - on the contrast of these principles an unusual interior of the bathroom of Oksana Balamatyuk was built. Behind the cold zone you can see a warm corner - a niche in the bathroom with a fireplace. Colors, textures, decoration, even plumbing Vitra - all beats the main idea: the opposition of the elements and the harmony of opposites. The bathroom turned out to be similar to the Snow Queen's boudoir, which, however, does not shy away from warm feelings. If you have a suitable niche in the bathroom - it's worth to do something original in it.
Plan of the room.
8 Receptions that are worth repeating
Comment in FB Comment in VK
Also in this section

Owners of small apartments have to choose: a shower or a bath, a washbasin or the opportunity to turn around, without touching the walls with the elbows. But the bathroom can be expanded due to the adjacent premises.

There are no children who do not like to wash. There are boring bathrooms. "Fairy World" from Lablablab Studio is not like that. Pond, frogs, trees and living floor make hygiene extremely attractive.
Creating an interior space in the bathroom, we strive to get not only aesthetic pleasure, but also functional. It is very important that every thing has its place. To do this, you can take care of the locker, special appliances, shelves, and you can also provide a niche in which you can store bathroom accessories, towels or other personal care products and household use.
In general, a niche in the bathroom is quite common. And the photo on the web is another proof. And there is nothing surprising in this, because it is convenient, and looks dignified.
Definition and functional component
The niche is an opening in the wall, necessary height and depth, for convenient placement of various things. The dimensions of the niche depend on each specific case. One thing is for sure, it's not worth doing very deep and high. After all, getting things out of the depths is inconvenient. Since you have to first remove objects that are closer to the edge of the niche. And in height, it can be quite long, if you divide it into shelves. This will accommodate more things.


What can be stored in this space? As already mentioned, it can be folded towels (provided that there is excellent ventilation in the bathroom); shower gels, shampoos and other personal care products (it is convenient if the niche is located just near the tub); household chemicals and so on. In a word, you can fit a lot in this space, the main thing is not to encumber it, because it will not only look bad, but also not very functional.
How to make?
There are several options how to make a niche in the bathroom, and in support of this many pictures are given. The simplest way is to have a niche in the layout of the apartment. Then it will only have to be finished, according to the interior of the whole room, and you can use it. If it has a large height, you can break it into shelves.


If the niche is not in the wall, but you really want to make it, the simplest option is to use a gypsum board structure. Thanks to the simplicity of erecting such a structure, everything will be done easily and quickly. It turns out, you need to make a false wall, pushing it a few centimeters. This will be the depth of the niche. That is, the frame is first made of profiles and guides. Deepening is envisaged. Then the entire structure is sewed with plasterboard. In the end, we get a new wall, only with a comfortable groove. And the height, depth and width we choose ourselves, creating a framework of gypsum plasterboard.


If you already have walls made of plasterboard. If you know the dimensions of the frame, you can cut one of the sheets of drywall, and then strengthen it with profiles. It will be difficult to do this. It may be necessary to tear off one sheet, create a structure of profiles, and then sew again.
It is also convenient to make a niche if the walls in the bathroom form an opening. Part of it can be sewed with plasterboard, leaving only necessary for such use.
If you do not know where and how best to look niche in your bathroom, you can see the examples with photos. This will allow you to choose the most optimal option. The main thing, taking care of beauty, do not forget about convenience. That the received design was convenient to use.
Related articles