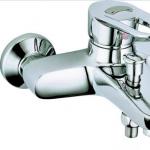
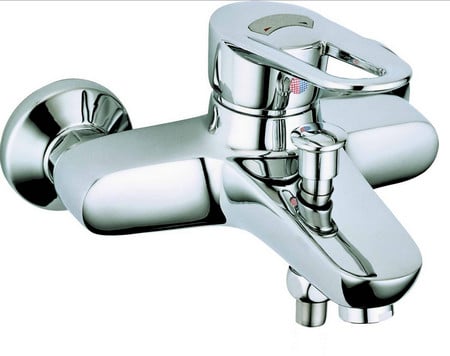
How to unscrew the old faucet in the kitchen. How to change the hose on a mixer
Everyone is faced with the need to replace the mixer in the bathroom, which can not be repaired or does not fit the updated design of the bathroom. To understand how to change the mixer in the bathroom, it is not necessary to be a professional plumber. The arising problem can be solved independently, having studied technology of performance of works and having armed with the necessary tool.
The entire replacement process consists of two stages: the dismantling of the old and the installation of a new one. Before dismantling the old device, you need to decide on a new model.
What should I look for when choosing a mixer:
- Place of attachment. Bathroom faucets are divided into two types - wall-mounted and built-in tubs or walls.
Embedded model of Zenta trademark, built in the side of the bathtub
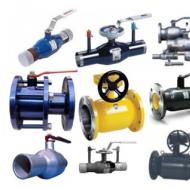
- Type of construction. Modern mixers from the constructive point of view are divided into ball and valve.
Ball valves regulate the supply of hot and cold water with one handle. They are more practical, convenient, elegant. To prevent clogging of small particles of the ball mechanism, it is recommended to install a filter for water purification.
Since the valves have long been familiar. They are adapted to long-term operation in conditions of hard chlorinated water.
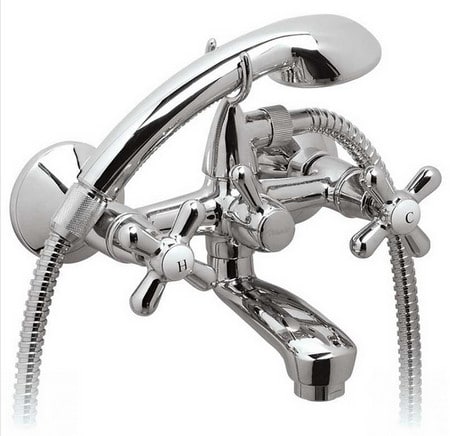
Faucet Bathroom Faucet
Precursors of repair or replacement of the mixer
The most common are the following breakdowns:
- There is a closed tap.
- Humming when the water is turned on.
- Less pressure than other cranes.
It happens that the repair of a failed mechanism is expensive, or simply impractical to implement it. The optimal solution in this case will be a mixer replacement. Change the mixer in the bathroom is more difficult than in the kitchen. In addition to the usual elements for switching hot and cold water, it has a water supply system with a bath / shower and a shower head.
How to replace a wall mixer step by step instructions
- Close the hot and cold water on the cranes. Then you should prepare the tools. You will need a wrench, a screwdriver, pliers, a hammer, a chisel, flax and a lubricant. A bucket and a rag may be useful, especially if the water pipes are already old and even with closed valves, the water remains.
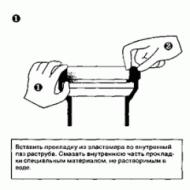
![]()
Adjustable wrench for crane replacement
- Unscrew the mixer nuts using the adjustable wrench.
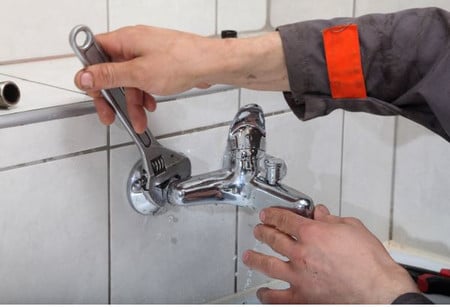
Unscrew the crane nuts with a wrench
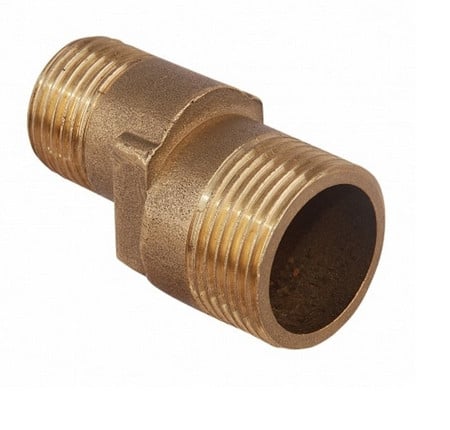
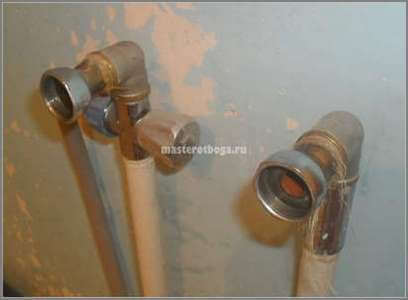
- Examine the state of eccentrics. If they are rusty, they need to be replaced with new ones. As a rule, quality brass eccentrics do not require replacement.
For each thread, the flax is wound counter-clockwise, smeared with plumbing paste and screwed into the pipe. If there is no flax, a special sealing tape will do.

We wind flax on the thread of eccentrics
The two eccentrics should be screwed into the same number of revolutions. To expose them symmetrically.

The location of the eccentrics depends on the distance between the valve nuts
- Screw the sham cups. Under the carving of decorative elements, the sealant is not to be reeled.

Screwed decorative cups
- Tighten the mixer nuts manually until they stop. The key is to twist a quarter of a turn. If to squeeze, it is possible to damage rubber gaskets or fragile details of the new mixer.

To make a crane by hand, tighten the nuts with a key
- Turn on the water, check. If a leak occurs, it is worth trying to tighten the nuts. If this does not help, you will have to redo the work again. It may not be enough wrapped seal or too thin a gasket. After fixing the faults, the remaining elements are fastened - a gander and a shower hose. Check the flow of water from the bathtub to the shower.
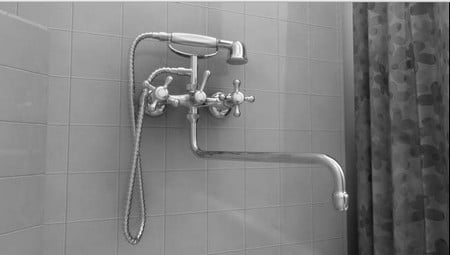
Done! You can admire the result of their work
In principle, replacing the old mixer - the process is not particularly laborious. If desired, you can manage the task yourself. But there are times when it is better to entrust this to a specialist whose work experience will help to cope with unforeseen situations. A professional will easily unscrew rusty eccentrics, remove their remains if they crack and remain in the opening. Without attention, there will not be many nuances that the installation technology assumes. In any case, the owner takes the decision to do himself or call the worker.
The mixer is a very useful device in the bathroom, which allows you to turn on the water of the desired temperature and head. The invention is quite simple, but extremely useful. However, due to frequent use, the mixer late or early may become unusable. In most cases, the breakdown can be eliminated by simple repairs: tighten the nuts or change the gaskets. But sometimes a complete replacement of the mixer is required. And then the question arises: call a plumber to solve this petty problem or change the mixer in the bathroom yourself.
The choice in this situation remains for you, but as a self-taught master I will say that if you have a simple plumbing tool, you can perform this work yourself.
When it is necessary to change the mixer in the bathroom.
The mixer began to leak from the joints (for example, with eccentrics). You can try to tighten the nuts or put new gaskets. If it helped - well, if not - will have to be changed.
Flows from where it is laid: from the spout, but in the closed position. It is necessary to change the cartridge or the tap-axle (depending on the type of mixer). If it still leaks - it's easier to change the whole device.
The water pressure is much lower than in the other mixers. Something clogged, it's easier to buy a new device.
The mixer is old. From time to time they need to be changed, nothing lasts forever. Frequent fixes will sooner or later lead to the inevitable and you will have to change the mixer in the bathroom yourself or with third-party help.
There is a huge variety of models of mixers, which differ in price, appearance and technical characteristics. How not to get lost in this magnificence? Before changing the mixer in the bathroom yourself, pay attention to the following nuances when buying:
Type of mixer. Mixers are valve and lever.
Valve - the old model, but come across and modern models with valves. To open the valve, turn the valve 2-3 turns (if there is a crane inside) or a quarter turn (if inside a ceramic plate).
Leverage - a new sample. The water temperature and head are controlled by the position of one lever. A special cartridge is installed inside.

Fastening mixer. It can be mounted in a wall or on a sink or bathroom.
Material of manufacture. The mixer should be able to withstand a considerable pressure and serious temperature changes, be strong enough to last several years. How to understand that in front of you a mixer made of good metal? Very simple! Than the mixer is heavier, so it is safer! Otherwise, the problem of how to change the mixer in the bathroom yourself, will become very frequent for you.
The length of the spout. The nose can be either short (5-10 cm) or long (30-40 cm). Which one is right for you? Come from the size of the plumbing: a washbasin or a bathroom. A jet of water can be poured into the middle of the sink or into the drain hole of the tub. It's bad if it hits the walls or sides.
Rotate the spout. Very often in the bathroom set one mixer and on the sink, and on the bath. To do this, the nozzle should be able to rotate at the mixer.
Retraction to the shower head. This function is not available for all models.
How to change the mixer in the bathroom by yourself? Instructions
So, how to change the mixer in the bathroom yourself? First turn off the water, and then open the mixer: the remaining water will flow out. Now you should get down to work.
First you need to dismantle the old mixer. We need a adjustable wrench, through which we unscrew the nuts counter-clockwise. If it is very tight, it's normal. Inside, scale or rust has already appeared, which means replacement is the right solution: the device has outlived its own.
If the dismantled plumbing device of a modern design, then changing the mixer in the bathroom alone will not be a serious task.
We take a new mixer. We put rubber joints in the joint and screw it to the eccentrics with the help of nuts. (Sometimes in the kit of a new mixer are not very high quality seals and it is better to buy new ones).
From personal experience, I add that before installing the mixer, it is desirable to clean the threads on the eccentrics with a metal sponge for washing dishes. So you get rid of the plaque, which will facilitate the installation of a new mixer.

Then we screw the spout, the watering can, also without forgetting the rubber seals. It is better to tighten with a wrench and tighten without fanaticism.
From personal experience, I add that it is often more convenient to first install the gander on the body of the mixer, and then perform the installation of the device.
How to change the mixer in the bathroom by yourself, if it is an old sample?
In case you are "lucky" and the last mixer was an old sample, then changing the mixer yourself will be a little bit more troublesome. It will be necessary to replace old-style eccentrics with modern ones. A bit of theory: eccentrics are the parts of a mixer that adjust its position to the level and allow the device to be mounted to pipes that are slightly out of line with the inlet holes of the mixer.
To do this, we remove the eccentrics with pliers, keys or whatever happens. It is more convenient to use the gas key.

Then take the tape of FUM or flax and screw it onto the eccentric thread from the thin side a few revolutions counter-clockwise.
After that we fasten the eccentrics. Do not twist to the end of 1-2 turns, set the desired size between them and the horizontal position using the level. Do not forget about decorative cups (reflectors), they are included.
After completing this operation, you can install a new mixer. After connecting the hose and the watering can, mount the shower holder, if required.
Done, now you know how to change the mixer in the bathroom yourself. Next, you need to open the water and inspect for leaks, attaching dry toilet paper to the connections. If somewhere leaks, you will easily notice wet spots on the paper.

In this case, you need to twist the connection slightly. Finally a small video, so that there are no questions, how to change the mixer in the bathroom yourself.
Bookmark this site
- Kinds
- Selection
- Installation
- Finish
- Repairs
- Installation
- Device
- Cleaning
Replacing the faucet on the sink
- Select mixer
- Mounting Type
- Ball and valve mixers
- Varieties of globular
- Replacing the old with a new one
Replacing the faucet in the kitchen or in the bathroom is a fairly simple matter, the main nuance of this procedure is to specifically follow the replacement steps, and then you can avoid any unpleasant situations.
Over time, a mixer of any type needs to be repaired.
The mixer can be called "the heart" of the bathroom or kitchen, which should perform not only its productive functions, but also the aesthetic.
The first thing, of course, is necessary. In this case, there is no need to protect the old basin mixer, it is better to spend a little more money, but also to get a quality crane that can serve you for a long time, and sometimes it can be lifelong.
Select mixer

Today in the hardware market there is a huge for the shell: the color, shape, device, variants of its design are presented in a wide range, and choose what you need is necessary for you, paying attention to the following basic nuances.
First, it is necessary to pay attention to the parameters that concern the spout. It can be fixed, turning, shortened, medium length (about 23 centimeters), and also long (from 30 centimeters). The shape of the spout is also one of the main indicators, which should be taken into account when choosing. There are only two of them: it is a cascade and traditional forms.
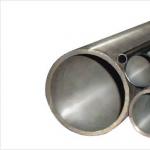
Today, the most popular mixers, having a traditional form of pipes - round, oval or triangular. Of course, that during the selection of any particular version of the mixer, you must proceed from the design of the bathroom and the style of design. Let's take a simple example, if the washbasin and the bathtub are located in close proximity to each other, then the best option in this case will be a common mixer that will have optimum dimensions and a device suitable for both a bath and a washbasin and, of course, the appearance of the mixer.
Back to contents
Mounting Type
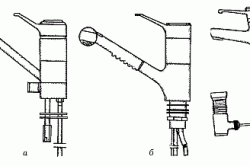
Some designs of faucets: a - a mixer for the kitchen, b - a kitchen faucet with a shower grate, c - a mixer for a washbasin with controlled release.
Secondly, an important indicator is the type of attachment of the mixer. Today there are four types of fastening, this is: for the shell (in this case there are 2 more kinds - on the wall or directly on the sink, the first kind being much less common), for the bath, for the shower and for the bidet.
As for the bathtub faucets, they, as well as faucets for the sink, can be installed either on the bath or on the wall. In the first case, the water flow control knobs and the mixer itself will be on the bathroom surface, and in the second case they are on the wall, while this option can be called the most popular, since most people still prefer a more conservative option.
Today it's enough to find both the first and the second options on the market, the choice depends directly on your preferences and possibilities. Such models have a beautiful appearance and in addition, excellent quality characteristics. Such mixers have in most cases a long turning spout, which in turn means that they are economical, since they can be used both in the bathroom and in the washbasin located nearby.
The only drawback of such mixers is that sometimes there may be a leak that occurs when the mixer is "blown out" at the place of its attachment.
The next variety of mixers is for the shower. These mixers differ from the previous ones in the first place in that they do not have a spout as a rule. Instead, the device of similar mixers consists in the place of fixing the hose from the shower head, directly the watering cans and the handles of the regulation of hot and cold water supply. Of course, that mixers of this kind can be installed exclusively on the wall, no other mounting options can be.
And the last kind - mixers for bidets, which are in many ways similar to mixers on the sink. Most of their varieties are mounted on a special rim, using special fastening holes.
Back to contents
Ball and valve mixers

The third indicator is that absolutely all mixers are divided into 2 types, they are ball and valve. We will discuss each of them in more detail. In our country, it is preferable to use faucet mixers that can cope well even with low-quality, chlorinated water.
In addition to being able to work perfectly with such bad water, they are easily repairable, and repair work in this case will not hit hard on the wallet, since in most cases, the essence of doing such work is solely to replace the seals.
As for single-lever ball valves, they are now gaining popularity in our country. They have a more attractive design and in addition, a much simpler operating principle.
In order to adjust the optimum temperature and water flow, it is only necessary to pull the lever to one side and raise or lower it. Of course, such a mixer has its own drawback, which is that it suffers poorly enough of the poor quality of water passing through it (the presence of salt deposits, as well as various solid elements in its composition, is indicated on the low quality).

Thus it turns out that if the quality of the coolant (water) is low, then the working module of the mechanism is simply clogged, and the mixer then starts producing an unpleasant, grinding sound or just creaks when working.
As for the costs of repairing such mixers, they will clearly be much higher than the predecessor's. The high cost of repairing such devices is due to the fact that in this case it will be necessary to replace the entire ball module.
There is one nuance that will avoid unnecessary costs of repair - the installation of special cleaning filters, so that the mixer will be supplied already purified from a variety of impurities water.
Back to contents
Varieties of globular

In addition to single-lever ball mixers for the sink, there are also two-valve, and also thermostats. The device for single-leaf is described above, now you can proceed to the two-valve. This type of mixer has two valves, thanks to which the regulation of the supply of hot and cold water is carried out. In each handle, crane-axle boxes are installed, due to which the water supply is regulated, and rubber gaskets are used as seals.
This kind is most preferable, if there are often differences in water pressure. Thermostats combine the advantages of both previous devices. They are quite reliable, practical and ergonomic. The device of thermostats is a small panel on which are located 2 handles of water supply.
After the process of selecting a new mixer is completed, and you decide definitively with the last option, you can proceed directly to its replacement. In order to remove and for the sink, the following tools will be needed: the mixer itself, the combination pliers and the wrench, the hoses, the sewing wrench, the sealed paste, the small flashlight, the basin and the knife.
You will need
- Adjustable and rack-mountable keys;
- Pliers;
- Flashlight;
- Sealant;
- Basin;
- Hoses;
- Special sanitary tape.
Instructions
First you need to get rid of from the worn out (morally obsolete) mixer , blocking the water beforehand. Open the tap on the mixer so that the system gets rid of the pressure, and the remaining water from the tap has drained out completely. If you are going to change only mixer , you will just need to detach the hoses from it. If you want to change the hoses, disconnect them from the pipes of the piping.
Usually, the mixers are strengthened in two standard ways: on a narrow or broad basis. To remove mixer, reinforced on a narrow base, just climb under sink . If it is free enough, you can easily unscrew the nut using pliers. With a mixer on a wide base will have a little sweat. First you should untwist pens crane. To access the nuts holding the mixer, you need to get rid of the pens and more from the pads under them. Now you can unscrew the nuts.
After unscrewing the nuts, pull out from the sink mixer. Noticing the gasket located between the base of the mixer and the sink, remove it with a knife. Together with the gasket, get rid of old seals with lime bloom gathered around the old mixer. Remove limescale and other dirt can be diluted in water vinegar or a special household chemical means.
Now you can install a new one mixer. If it has a wide base, installation will be relatively easy. And if the base is narrow, it will be necessary to climb under the sink. It is necessary to tighten the nuts and simultaneously Control the tilt of the mixer and its location. And for this you need an assistant. Before using a new mixer, check for possible leakage, then remove the sealant residues from the mixer base.
note
How to change the mixer in the bathroom. Mixer is a sanitary device that allows you to regulate the water supply and obtain its required temperature by mixing directly in the appliance of cold and hot water. Like any device, the mixer has its life and operation. As a rule, first of all, hot water starts to leak.
Helpful advice
If luck has grinned to you - the indentations have turned out whole - you can start to mount a new bathroom faucet with your own hands. However, if the eccentric breaks down, do not despair either. Change the faucet-mixer we will still succeed. We take a chisel 10 to 12 mm wide, a hammer, and begin to crumble the indentation metal, not being afraid to spoil the internal thread. Watch the video. Read the pro How to change the faucet faucet in the bathroom with your own hands.
Sources:
- how to change the mixer itself in 2017
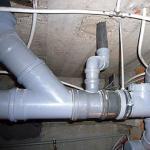
One of the thin places of connection of the mixer to the water supply distribution is the hose. After a long period of operation, it often begins to flow, which is due to the peculiarities of its design. At the same time the mixer is working properly. In this case it is enough to replace the old connection with a new high-quality product. It is important to start to choose the right replacement.
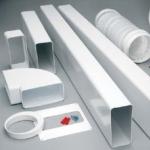
Devices and types of connecting hoses
The system that provides the connection of the mixer to the water supply network is called the lining. It can be rigid and flexible. The hose belongs to the latter version and is used more often. Its main advantage is the ability to simply connect the mixing device to remote pipelines.

Flexible hose is a folding hose in a braid. From both ends he has 2 fasteners:
- connection for connection to the mixer;
- the union nut, which is fixed to the water supply.
Products differ from each other in the kind of material from which they are made:
- for cheap products, the main hose can be made of rubber, which has a short operational period;
- rubber products are better and safer for health.
Pay attention! A poor-quality rubber hose produces a sharp unpleasant smell of rubber. It is easy to guess that such a connecting element is not suitable for drinking water.

The service life of the liner is also affected by the type of braiding that performs the function of protection against external and internal influences:
- jump or pressure drop in the system;
- external damage;
- sharp water supply;
- temperature expansions.

The outer shell can be made of four materials:
- aluminum;
- stainless steel;
- galvanized wire;
- nylon.
The latter option is on sale less often. Galvanized models are the most unreliable and are suitable only for temporary operation. Aluminum is inevitably oxidized under the influence of condensate.
The best option is a stainless steel braiding, which is designed for working pressure of 10 atmospheres and a temperature of up to 95 degrees. The operational period of such products is 8 years.

There are particularly strong hose models with a nylon or stainless steel sheath capable of performing their functions at a pressure of 20 atmospheres and a temperature of 110 degrees.
It is on the composition, technical characteristics and a number of indicators worth paying attention when buying a flexible connection.
| Flexible water supply for water. AquaTechnik, Russia. Characteristics | Indicators |
|---|---|
| Price | 62 - 215 rubles. |
| Inner diameter | 8.5 mm |
| External diameter | 12.5 mm |
| Connecting dimensions | 1/2" |
| Possible length | 0.3 - 3.5 m |
| Operating pressure | 16 atm |
| Maximum temperature | 95 degrees |
| Braid | steel thread |
| A tube | rubber |
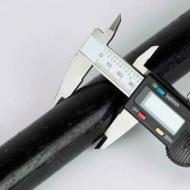
What to look for when buying
To buy a quality product, you should not save and hurry. It is necessary to evaluate several parameters of the hose.
1. It is necessary to inspect the shell, to hold a finger on it. It should be smooth, smooth. Notches and roughness are a sign of poor-quality products.

2. Another important external indicator is the presence of colored elements in the braid. If the threads are only blue, then the flexible connection is suitable only for cold water, red for hot. Universal models have inserts of both colors.
3. It is necessary to choose the correct length of hoses. During installation, they should not be strained or strongly sag.
4. The weight of the product can also speak about many things. The hose should not be very light, because in such models the shell is aluminum, and the nuts are made of unreliable silumin material, so they quickly lose integrity, are destroyed. Some cheap products have fittings of plastic. It is better to refrain from buying it.

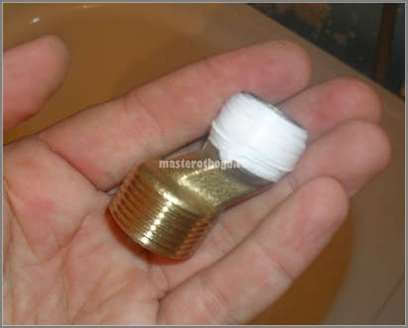
5. Low-quality material, from which the union nut is made, not only gives out a light weight. To determine what it's made of, you need to scratch it. If yellow metal appears under the spraying, then such products are more reliable, since it is made of brass covered with nickel. In other cases, you do not need to establish such a connection.

6. The connection must be securely connected to the hose.

Note! The connection points in the mixer may not coincide with the diameter of the hose fittings. In this case, you need to purchase an adapter.
7. The hose should be flexible enough. Otherwise, it can quickly fail.
Choose a sufficient length of eyeliner and the degree of flexibility
Thus, a quality product should consist of a rubber hose with a braid of stainless steel and galvanized brass fasteners and comply with the parameters of your water supply network. Having bought such a connection, you not only deprive yourself of problems for a long time, but you can easily install it.
How to replace the hose?

The whole procedure can be divided into 2 stages:
- dismantling of the old structure;
- installation of a new flexible connection.
But first you need to prepare tools and materials:
- hoses of the required length;
- gas key;
- adjustable wrench.
Note! It is often advisable to use seals when connecting mixers, but flexible piping is completed with rubber seals, so no additional material is required to seal the joints.
After preparing all the necessary, you can start replacing the connecting elements.
Step 1. Close the water supply to the mixer by turning the special valves on the wiring.
Step 2. Drain the remaining water from the mixer by opening the tap.
Step 3. Put a bucket or a basin for collecting water under the old piping, which will drain when the hoses are disconnected.
Step 4. Unscrew the union nuts and fittings using a wrench, turning it counter-clockwise.

Note! If you can not turn off the key with the key, since the scales or rust formed on the threads, you do not have to be zealous. It is better to treat the place with a special solvent, which in 5 minutes will soften all the formations on the thread.
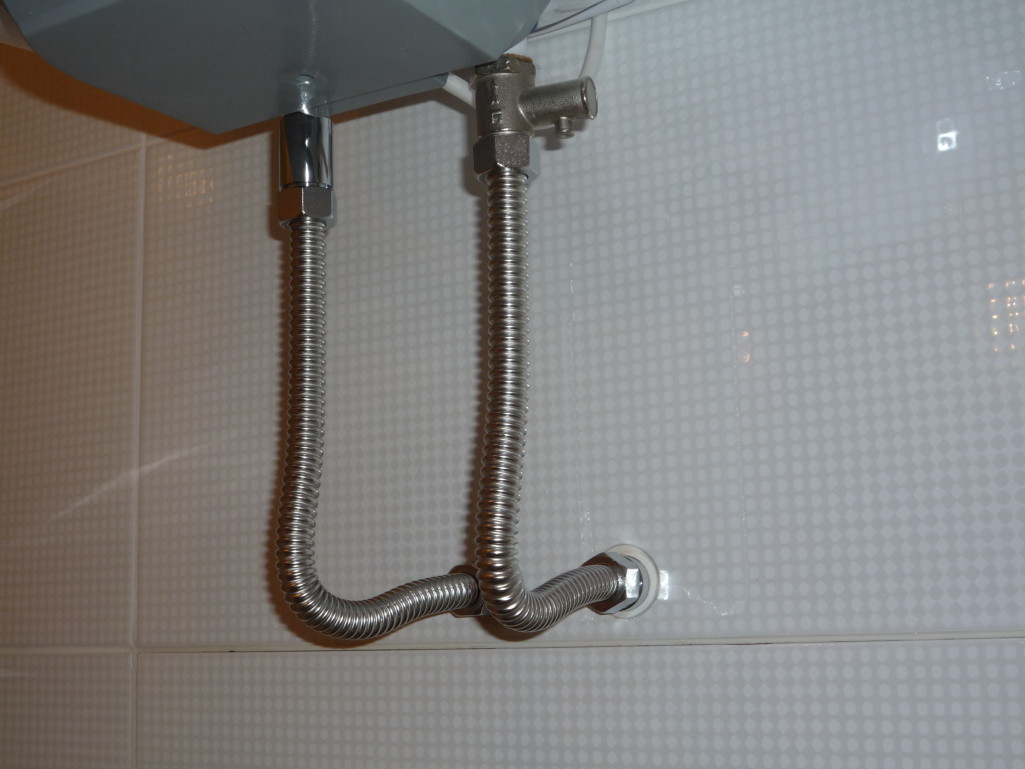
Step 5. Connect a new flexible lining. The main thing - tightly tighten all fasteners, but do not overtighten them, so as not to damage the sealing rubber gasket.


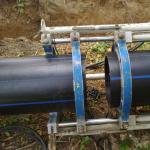
We fasten flexible liner to the mixer

We fasten the second hose


The connection is ready. Hoses should not be stretched, it is better to take a longer product and make a smooth loop during installation. Also, no kinks are allowed on the piping.
![]()
When the water is turned on for the first time, it is worth checking the tightness of the entire connection.
As can be seen from the article, when observing elementary rules, it is quite easy to make the installation. And it is important not to save money when buying quality products.
Video - Replacing the hose on the mixer with your own hands
Choose a sufficient length of eyeliner and the degree of flexibility
Related articles