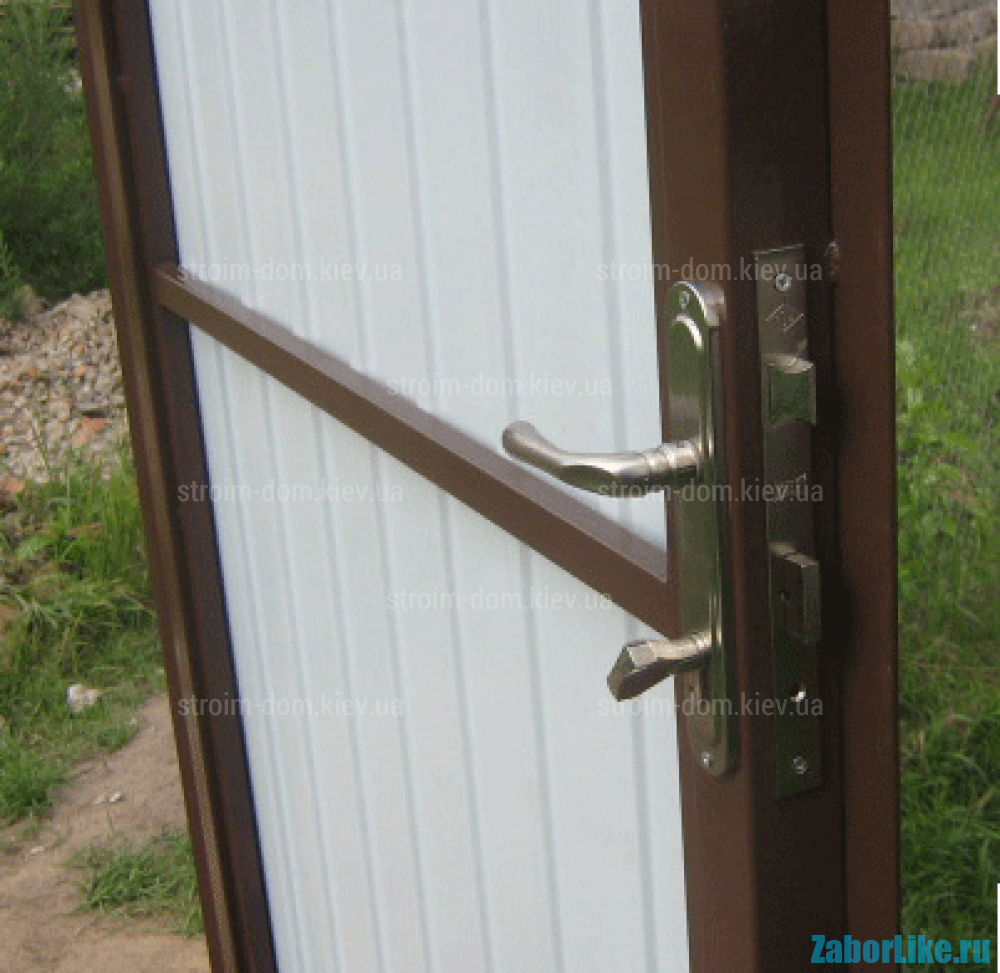
How to weld a wicket from a round tube. Gates and gates from profile pipes: advantages. How to weld a wicket from a profile pipe
A lot of summer residents today prefer to install a gate with a wicket on the basis of a profile pipe as the fence of their site. Such pipes are made of different alloys, very often very light connections are used. A gate and gates from the profile pipe, connected to each other in a single design, will reliably protect your site from uninvited guests.
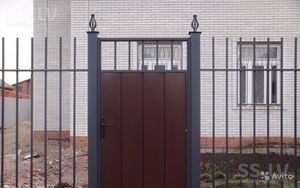
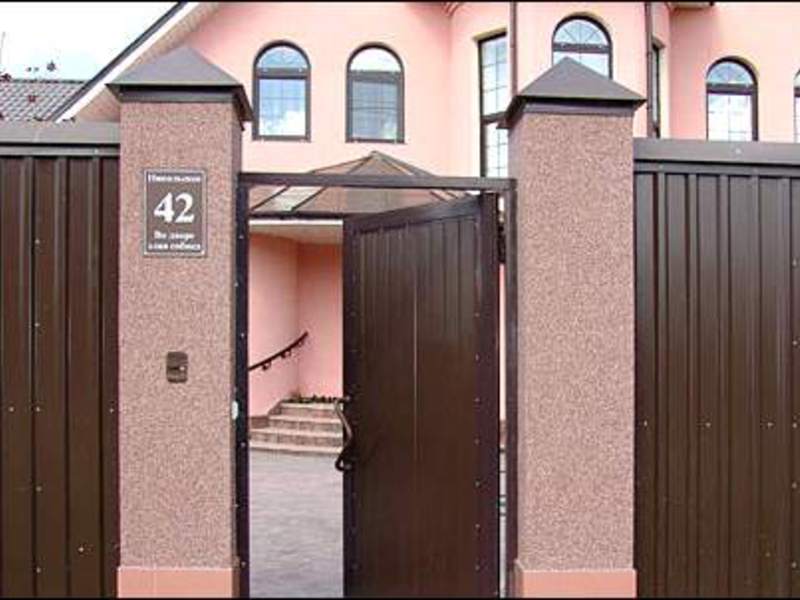
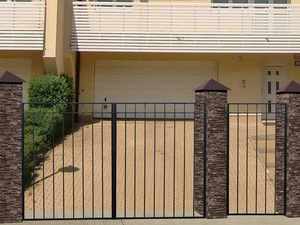
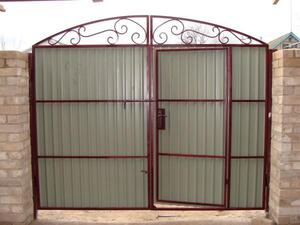
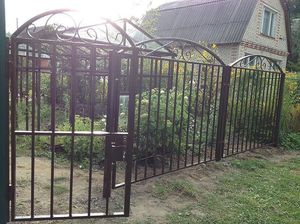
Today we will tell you how to make and install a gate and gates from profile pipes with our own hands. Also in the article there are photos of finished products installed in suburban areas. Thanks to such photos you can determine the style and color of the design.
Gates and gates from profile pipes: advantages
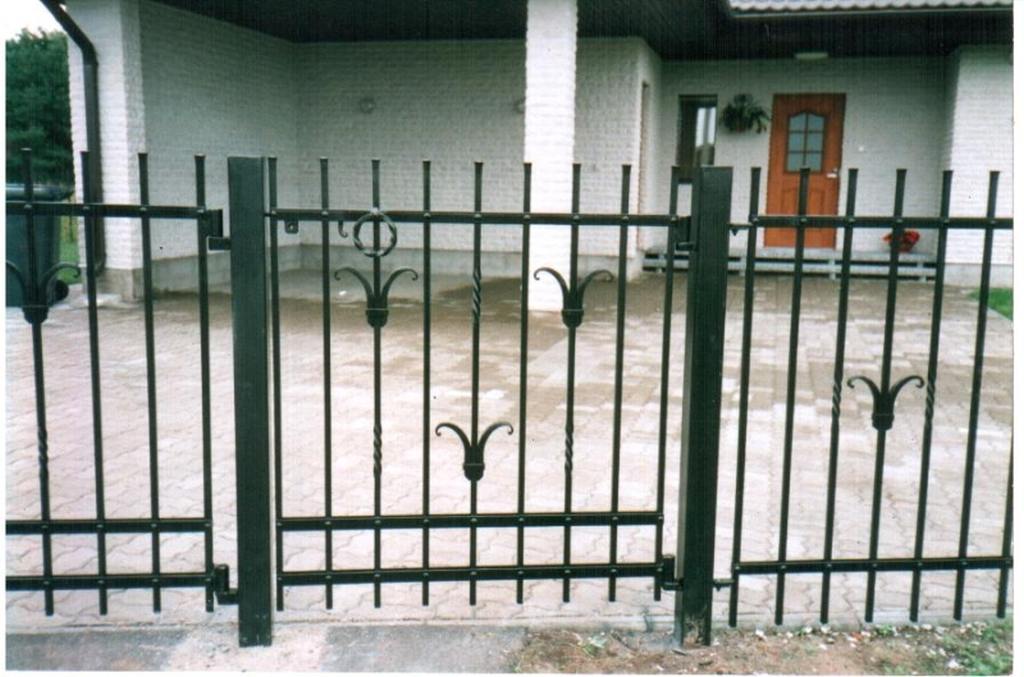
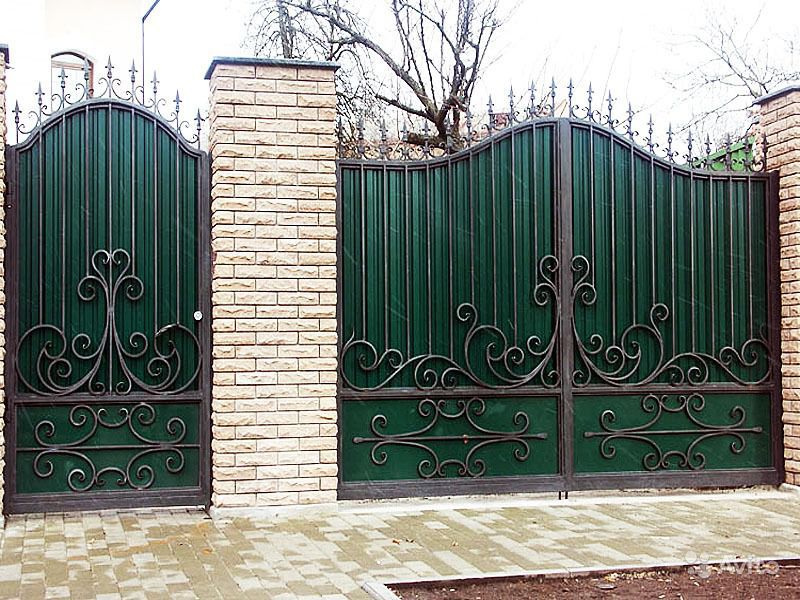
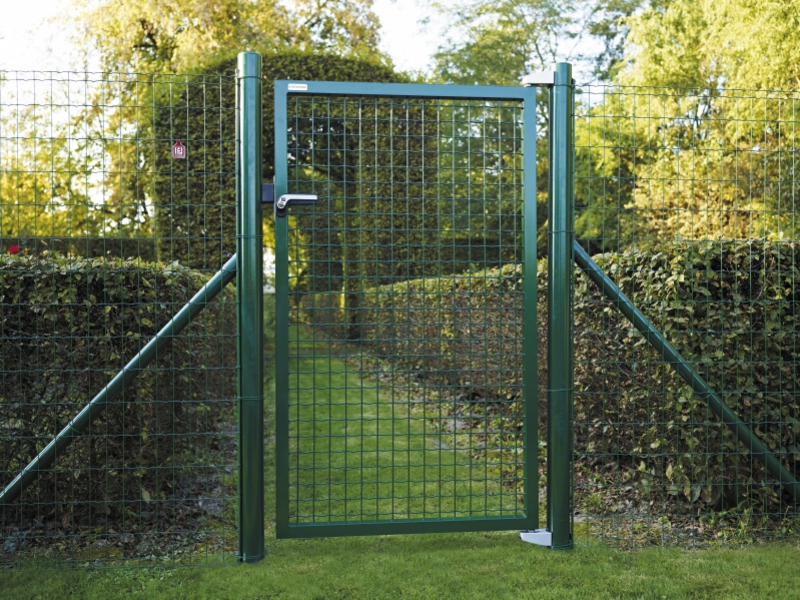
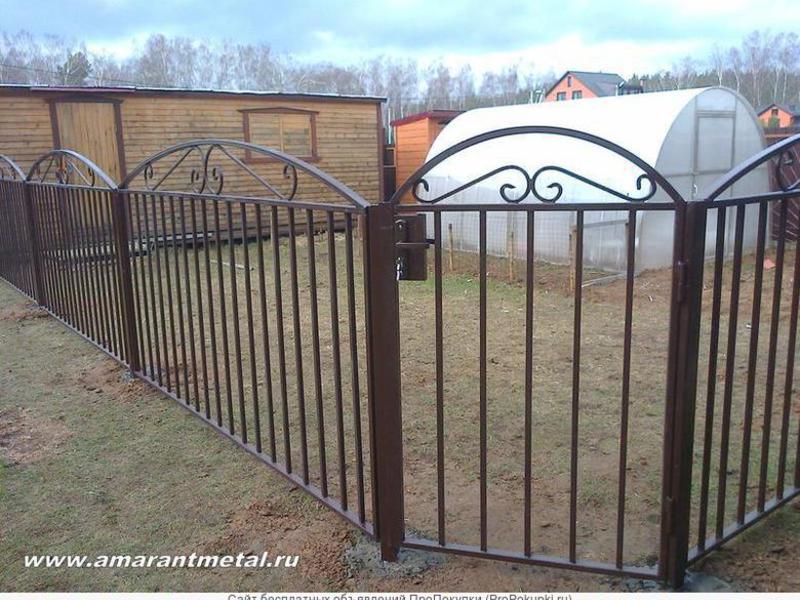
The photos below will give you a visual idea of how the finished ensemble of gates with a wicket made of plastic pipes looks. As you can see, you can choose stylish options that will decorate your site.
Advantages of structures based on profile pipes:
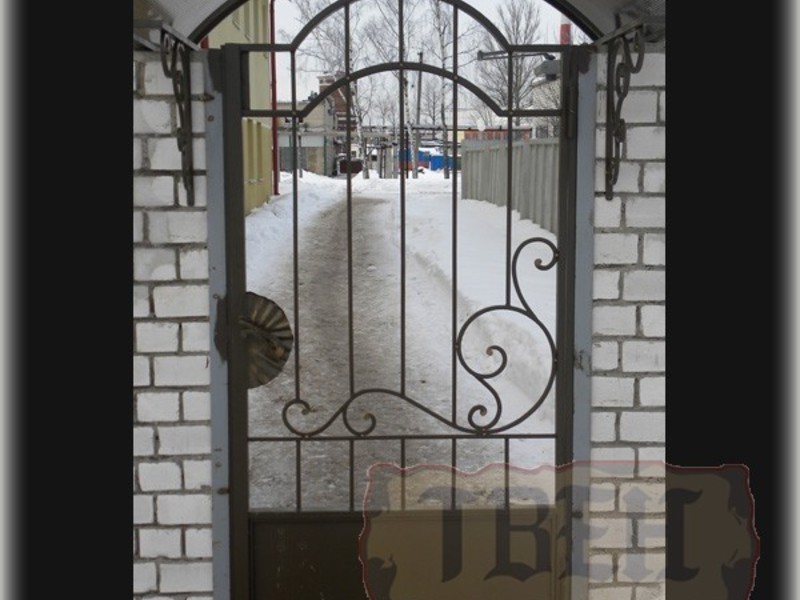
Wickets from profile pipe


What will it take to work?
To quickly install the gate and gate you will need the following tools:
And materials for installation will require the following:
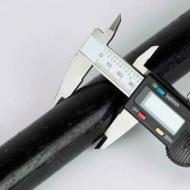
- profile pipe. She is should not be very thin, while it should be rather rigid and withstand sufficient loads;
- anticorrosive liquid (as an option gasoline);
- paint;
- primer;
- hinges for gates and wickets. They must be powerful for holding the load. It is advisable to take with an integrated bearing ensuring smooth motion of the structural elements;
- material for plating, if you plan it;
- lock for the gate;
After purchasing the necessary materials draw up a draft of the future project, which you previously selected, prepare the profile and calculate carefully all sizes. It is very important to accurately calculate all the parameters so that in the future the gate and gates open and close without problems.
Wicket and gate installation: stages of operation
Do it yourself from the profile pipe gate and gate is not so difficult. After you have prepared all the tools and materials, you can start working. Below is a step-by-step plan for installing the structure.
Installation of poles
The construction should be put on poles. When installing a gate with a wicket, the pipes should be taken per meter longer than the designed height. The frame will be attached to these pipes. Besides, posts must withstand the load of additional parts, but also not to succumb to wind gusts and to avoid sagging of the structure. The work includes such actions:
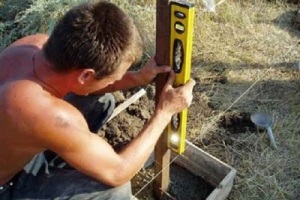
Posts should be installed correctly, they should stand strictly vertically. To do this, use a plumb line. The more level they stand, the better the whole structure will be installed.
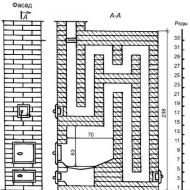
How to make poles of bricks?
Metal poles for gates with wickets can not always fit into the overall style of the exterior, so they can be made brick by encasing the main pillars with bricks.
This solution will only improve the quality of the entire structure, and the gate and gates from profile pipes will become more stable and will be less exposed to negative external influences. In this case, you can choose a brick of different shades and configurations. Laying bricks looks like this:
- first we prepare the solution by analogy with the previous point, but its viscosity must be reduced;
- the first row is laid out with whole bricks;
- second row lay out bricks the size of three quarters, so that the order is stronger;
- install in the seams of the laying mortgages in the form of metal plates with a thickness of 5 mm;
- wait until the solution has dried, but not completely and make the bark;
- at the top of the brick pillars you can put decorative caps, which not only give the construction a complete look, but also drain the water in the rain. They can be purchased in ready-made form or ordered to be made according to individual design.
Features of the frame installation
When assembling wickets and gates from profile pipes, you need to have a prepared workplace available. The best welding table is suitable.
You can start making the frame structure. Remember that the quality of all elements depends on its quality. If something is done wrong, then the system may be broken.
Stages of the structure of the frame are:
Also, do not forget about the accuracy of the layout of the structure and check the plane with a level so that the so-called propeller does not appear later. Before the welding process, all elements must be pressed with clamps.
Now that you have assembled the frame of the gate and the gate, you can hang them on poles.
How to attach the gate and gate to the posts?
To attach a gate and gate to the posts, you need use only powerful veils, this will give the structure stiffness and eliminate sagging. It is better to use fasteners based on the bearing, so that everything works long and reliably.
Extremely it is advisable to leave a small gap between the gate leaf and the ground length of at least 10 cm. Thanks to this, the mechanism will be free to work even with a thick snow cover.
So, all the work on manufacturing and installation are completed. If you want, you can show creativity and decorate the gate with the gate as you wish. You can decorate them, decorate them with decor and so on. Ideas and photos of tangential design you will surely find on the Internet.
Each person seeks to maximally secure their homes and protect access to it for strangers. That is why many owners of country houses, as well as dacha parcels put on their territory a fence that will not only protect against the penetration of intruders, but also hide from the wind and extraneous views.
And in order for the tenants themselves to enter their house unhindered, an opening is made in the solid wall of the fence. It can be a gate or even a small gate. But in any case, their design should be very reliable and strong.
There are two ways to solve this problem. Many people are wondering how to weld the wicket from the profile pipe. If you own a welding machine and have at least some small handling skills, then you can take up the manufacture of the wicket yourself.
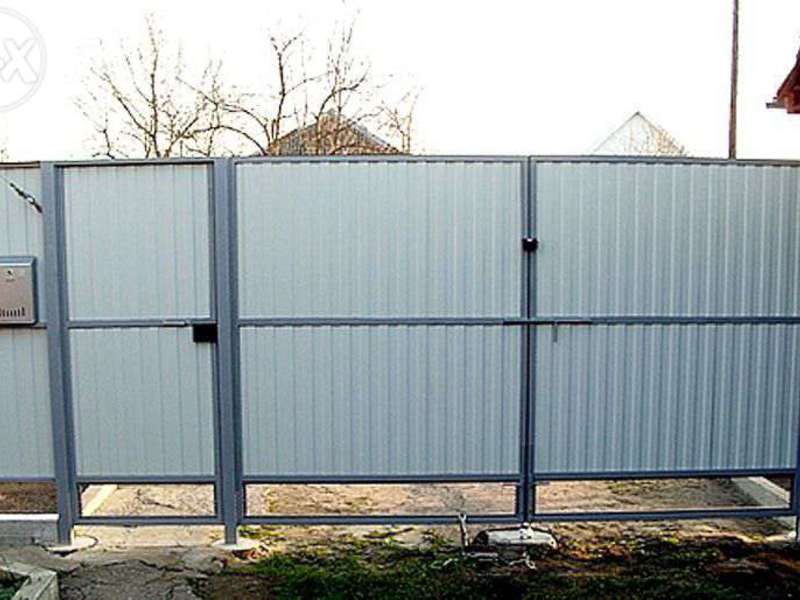
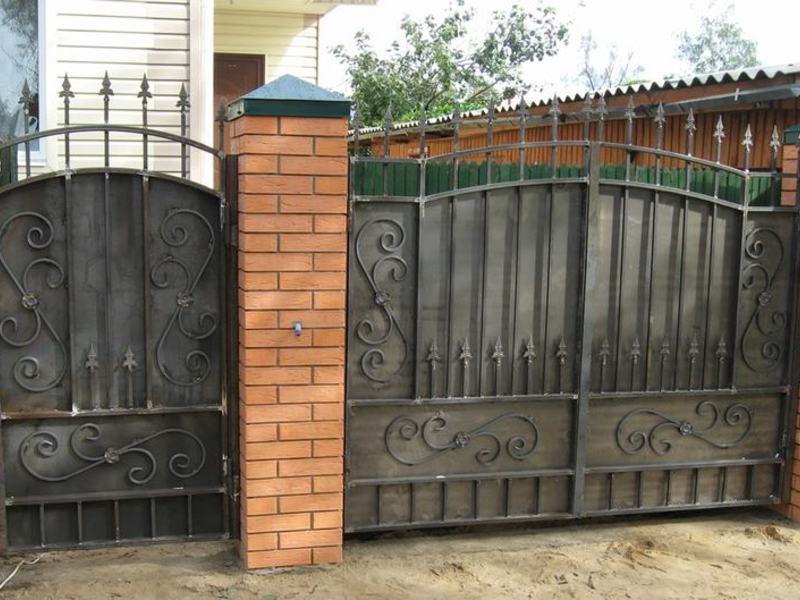
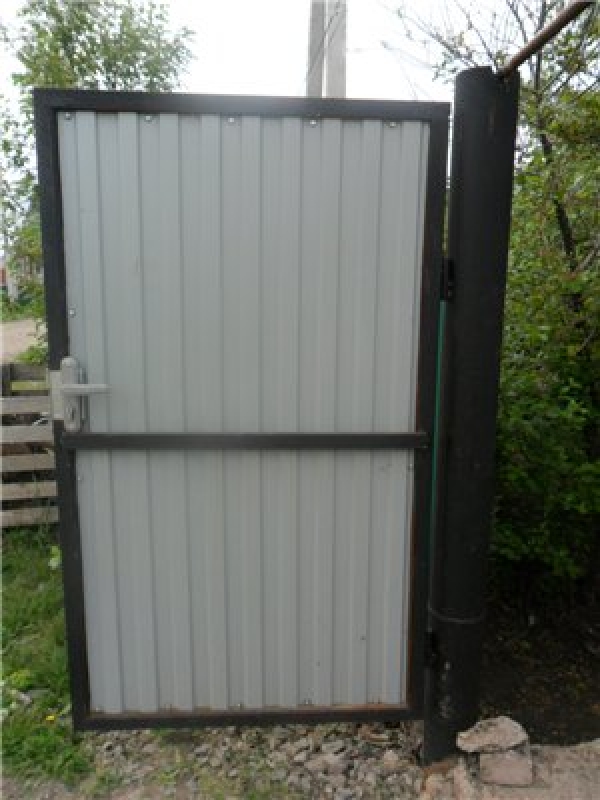
Product from profile pipe and corrugated board
In the second case, you can simply seek help from a company engaged in the manufacture of such products and purchase a ready-made structure.
Note!The process of manufacturing a wicket is quite simple and does not even require the use of special equipment or the presence of an assistant. If you use the recommendations on how to weld the wicket from the profile pipe, you can easily do it yourself.
Preparatory stage of works
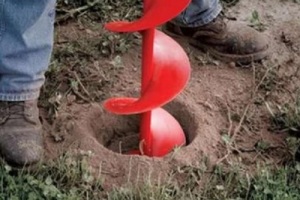
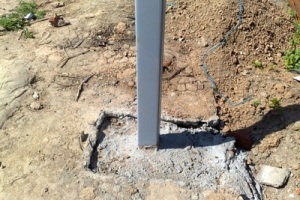
Having agreed that the manufacture of the structure does not take you much time, it is worthwhile to clarify that before welding the wicket from the profile pipe, it is necessary to install the supports on which it will be fixed. It can be simple pillars made of wood or metal, or you can choose a more beautiful option by installing pillars with masonry.
Note!The simplest and at the same time reliable option - to use metal pipes with thick walls or channels.
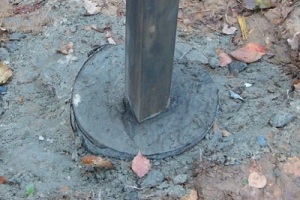
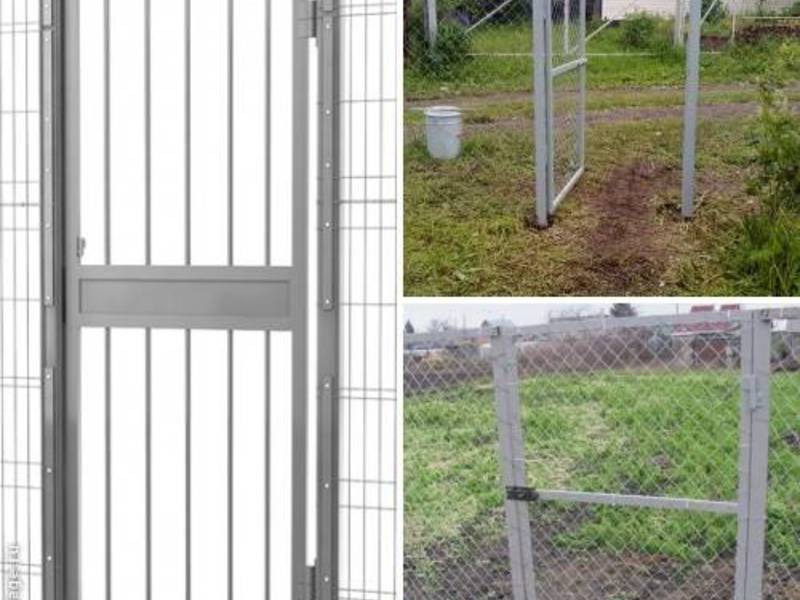
![]()
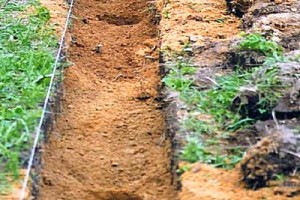
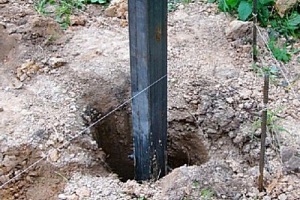
Support after filling
Mounting of supports:
- Perform markup by specifying the location of the columns.
- In the planned places it is necessary to excavate depressions, their diameter will be 60-70 cm, and in depth they should go about a third of the length of the segment of the support that will be above the ground.
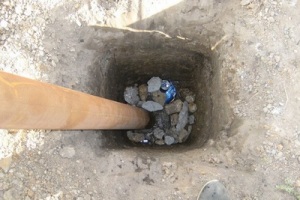
- The bottom of these pits is covered with small gravel or crushed stone, after which the embankment must be carefully tampered.
- For the support to be as stable as possible, a piece of thick steel sheet can be welded to its lower part. After that the pillar is lowered into the recess.
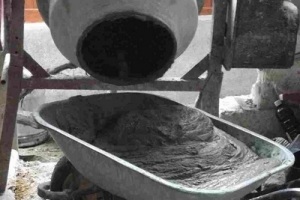
- Prepare a mortar of concrete, gravel or crushed stone can be used as filler material.
- While holding the post in the vertical position, pour the groove with concrete solution.
Similarly, the second column is also installed. In case you decide to make a gate instead of a gate, you will need to install a third support.
Note!After pouring poles with a concrete solution, the installation of the structure itself can be started not earlier than in a couple of weeks. It takes so much time to let the concrete dry completely and grasp well.
In order to ensure the supports are strictly vertical arrangement, you can weld to their upper ends a crossbar in the form of a thin pipe or a metal rod.
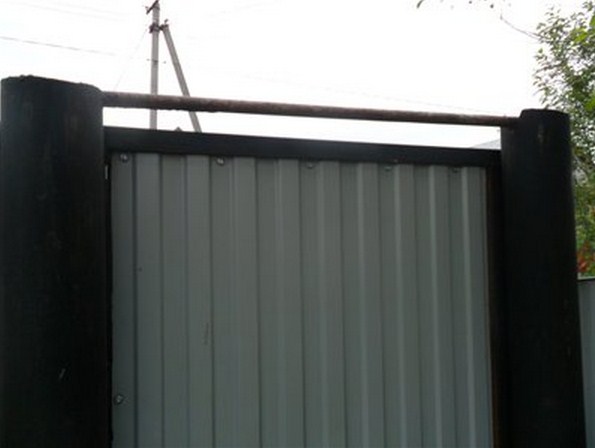
Crossbar for fixation
With regard to the calculation of the necessary materials, you need to build on the size of your future product.
In our case, we take:
- profile pipe, the meter can be calculated by measuring the perimeter of the gate, adding to it its width (pipe diameter 20x40 mm);
- steel corner, which will be placed along the perimeter (25x25 mm);
- profiled sheeting with galvanized coating (C10 or C8), it must be ordered in advance, relying on the height of the future design;
- self-tapping screws with a hexagonal head, with a color corresponding to the shade of the corrugated board (20-30 pieces);
- gate or garage hinges;
- reliable lock;
- easy to open handle.
If you do not know enough how to weld a wicket from a profile pipe, the photos and instructions below will help you with this task.
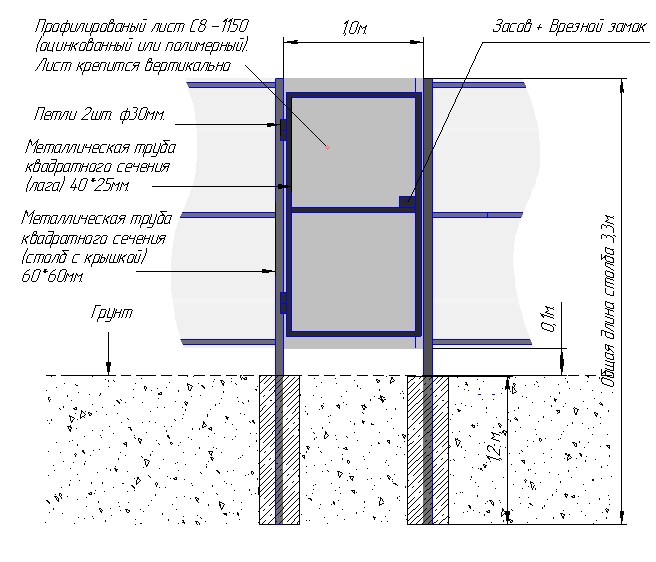
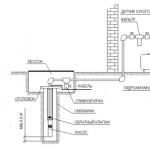
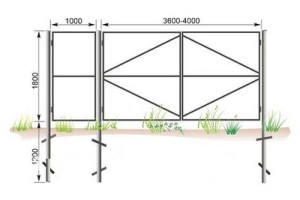
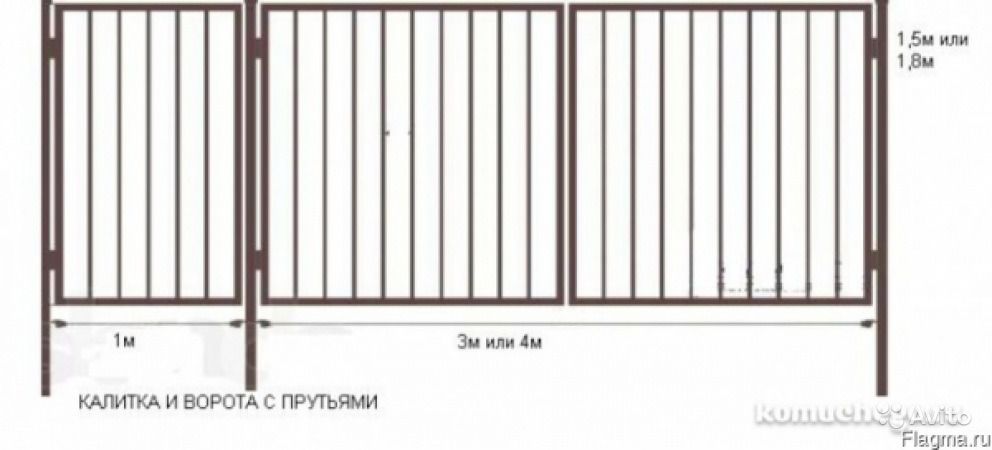
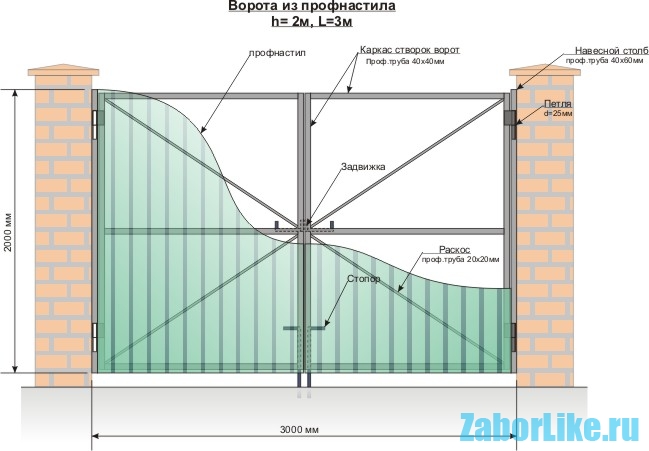
Structure diagram
Product Manufacturing
You can see how to weld the wicket from the profile pipe to the video below.
Note!If you place the lining material not from the outside, but inside the frame, the product will be more reliable and aesthetic. For these purposes, metal corners are needed.
Step-by-step instruction:
- Run two segments from the pipe. They along the length should exceed the pieces of the profiled sheet you prepared by about 0.5-0.6 cm.
- In addition, it is necessary to cut two more pieces of pipe, their length should exceed the width of the profiled sheet by 0.5-0.6 cm.
- Lay the horizontal pieces of pipes on vertical drains on a flat surface. Then you need to grab these details by welding in the corners. Do not forget to make sure that all the diagonals of the resulting frame are equal, and the angles are straight.
- Using the inside dimensions of the frame, prepare several parts from metal corners (steel). The ends of the workpieces need to be cut at an angle of 45 degrees.
- The resulting corners should be placed inside the frame at the appropriate place and welded together in matching sections. Do not forget to weld them to the frame itself.
- Check the correct placement of all parts and the general geometry of the structure. After this, you can fully weld all the joints of corners and pipes.
- Welding points should be carefully ground.
- Cover the frame with a primer coat, and then with a paint designed for metal surfaces (two times). Also it is necessary to paint the workpiece from the profile equal to the width of the wicket and will be a jumper.
Jumper for durability
In order to mount the profiled sheet, it must be inserted into a frame made of corners. If there is a need, the material can be cut slightly with the help of a Bulgarian. The lining is fixed by screws on the perimeter from the front side. The color of the heads on the screws may differ from that of the profiled sheet. In this case, the fixing elements are twisted from the back side, their ends are cut off by the Bulgarian, and then painted over.
Note!If your construction will be equipped with a lock, then all work on its installation should be carried out before the cladding.
After the corrugated sheet has been installed, the last detail is welded - a jumper that runs along the width, which was previously painted by you.
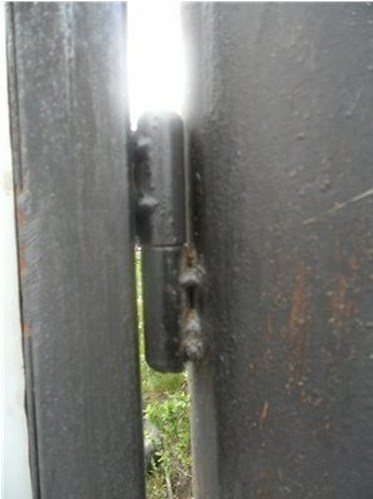
Loop location
Installation of the product:
- Leave a gap between the bottom of the structure and the ground below it about 20-30 cm. For this, you can lay bricks or bars of appropriate thickness between the supports. Mark the point where the loops will be located.
- Weld to the frame that part of the hinge, which should be located at the very gate. Connect it to the other half.
- Attach the construction to its proper place and weld the second parts of the hinges, keeping the structure in the desired position.
This method of fastening can be time-consuming, since it is very difficult to hold a metal product on weight. But in this case, you will know for sure that both halves of the loops will coincide.
Profiled metal sheet can be called a universal material, as it is used in private construction for a variety of needs. They overlap the roofs of houses and auxiliary structures, it is used to create walls and partitions in the houses, it is also suitable for fencing, gates and gates. Often, by the way, it happens that starting from the gate or gate, the landlord realizes in practice the simplicity and convenience of working with this material, and this encourages him to fully update the old wooden fencing of his territory with the use of corrugated board.
About the fence from the corrugated board there are separate publications on the site, and in this article let's look at how a wicket from a metal profile is made by oneself - the scheme + the order of the work performance. On the example of this, the smallest area of the fencing of the territory, it will be easier to understand the principle of operations performed, with the necessary tools, materials and components, with the main technological methods used during installation.
Required Tools
Everyone knows that when working with metal parts for fastening individual elements to a common design, welding is most often used. Indeed, this is the most reliable way for metal fixation. Nevertheless, there are cases when it is not possible to use such a technology, and then the masters resort to other methods of installation.
So, for the manufacture and installation of a wicket with a skin made of metal, it is necessary to prepare:
- Welding machine. This device is always useful to owners of private houses, especially those who conceived a major overhaul of their homes or engaged in the erection of farm buildings on the backyard. For non-professional masters, it is enough to have in your instrumental "arsenal" an inverter welding machine with a welding current of up to 160 ÷ 200 A. The price of these devices today can be considered quite affordable, with proper handling the device will last for many years. And, by the way, it will help to save even larger amounts, as the invitation for any occasion of the welder with his equipment - is not cheap.
Thus, the door of the wicket can be solid, that is, completely closed with a sheet of corrugated board.
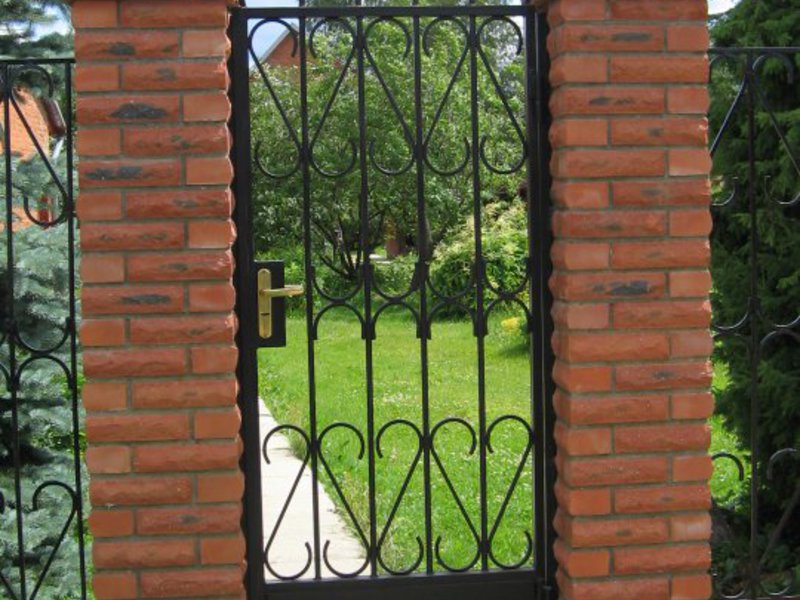
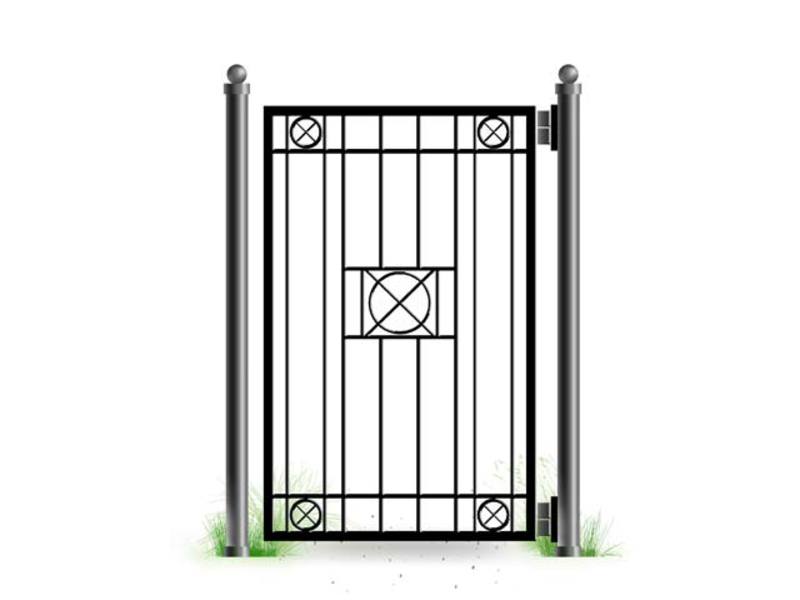
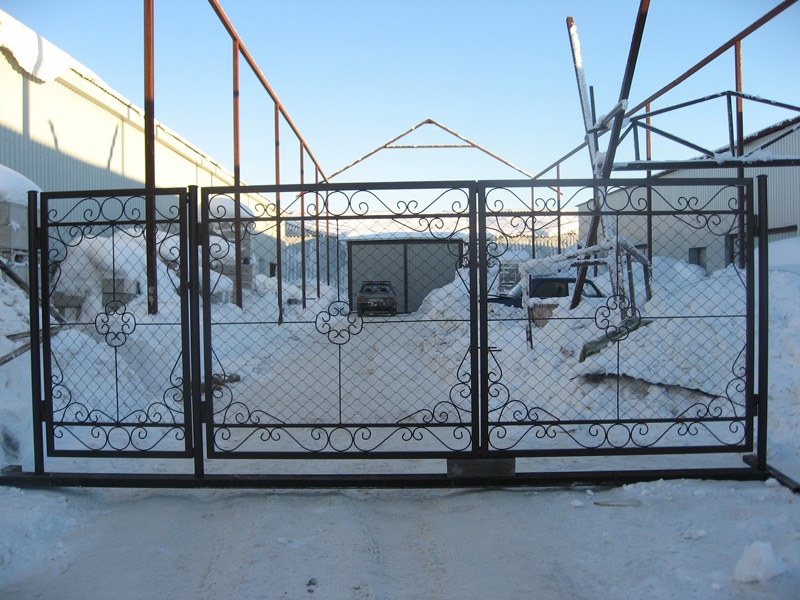
Some amateur masters choose individual designs that have horizontal or vertical openings, which are closed by grids welded from reinforcing bars, squares or stripes of metal.
It turns out very original, when the metal profile sheet is combined with other materials - this can be polycarbonate, wood or plastic.
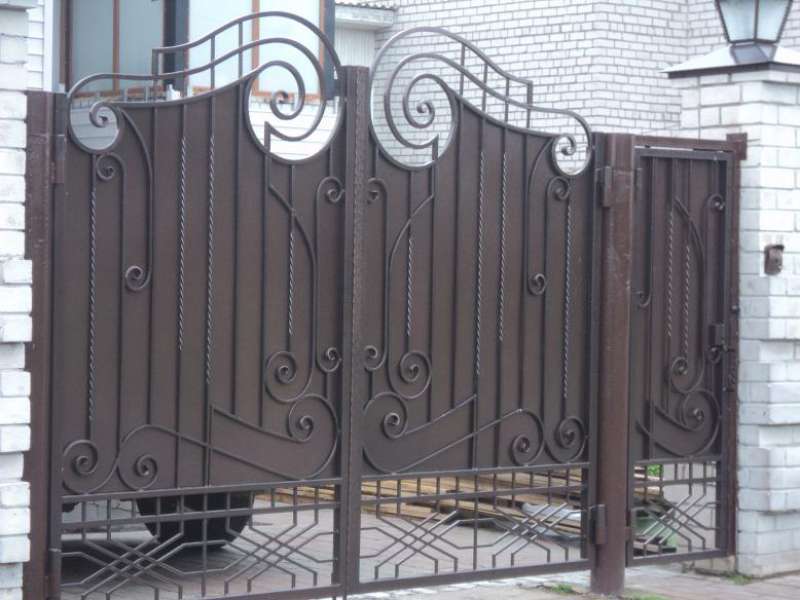
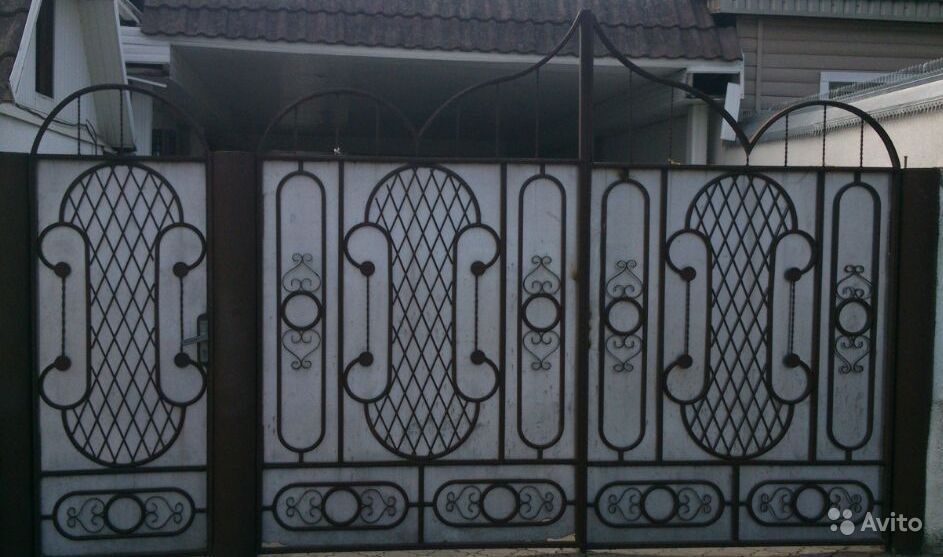
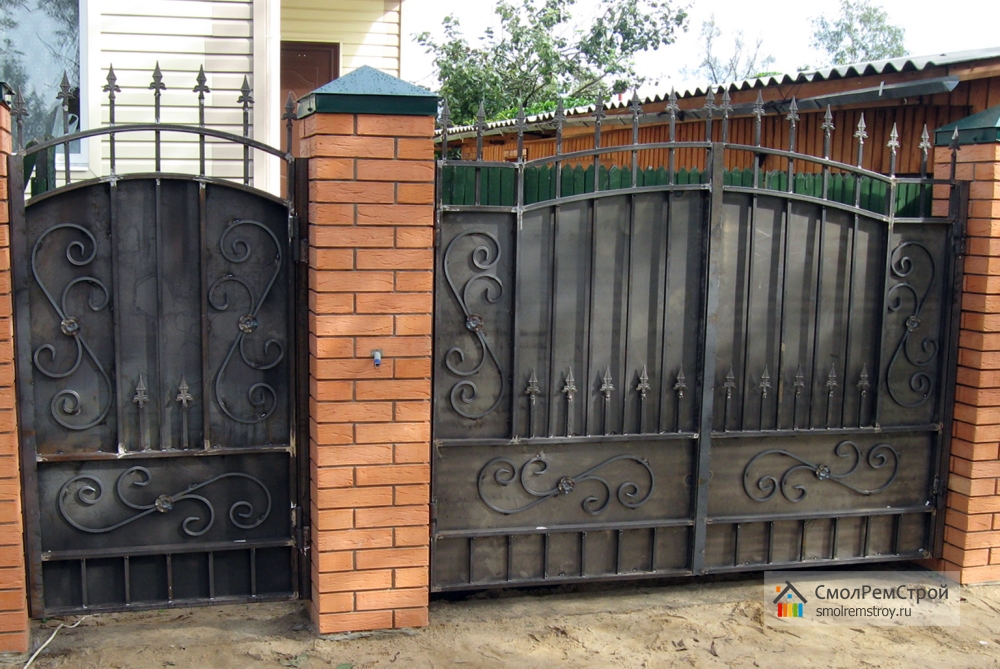
Another variant of the design is a combination of corrugated board with inserts made of forged elements, which not only make the decorative design, but also give it extra rigidity.
The frame of the wicket can also be done in different ways, the main thing is that it should be rigid and perfectly even. The rigidity of the construction is achieved by horizontal bridges (lags) and diagonal inserts (stiffeners). The latter can pass through the entire structure of the frame, or cross each of its segments, into which it is divided by cross-members.
Here you can also give an example of stiffeners, which are made of reinforcing bars, which are mounted in the form of a lattice. These ribs are welded to the inner surfaces of the frame pipes, which must necessarily have a horizontal cross member that will connect the vertical racks of the structure to each other, removing the load from them. Such a grate will make the gate or gate more durable, since the metal profiled sheet has a small thickness and easily crumples, even from a strong blow by hand.
And yet, for example, let's consider the simplest and most common design of the wicket from corrugated board on a metal frame.
1 - supporting poles, which are also vertical stands of the "box" wicket. For their production, a profile pipe with a section of 60 × 60 mm (rarely 80 × 80) is most often used. The length of the racks is immediately chosen such that they are sufficient to penetrate into the ground and the calculated height of the gate.
It is clear that the gate is never "on its own". That is, its supporting pillars can simultaneously be fence posts or gates.
2 - pits are digging pits of the required depth. If the soil is dense, then it is enough to drill a well with a depth of 900 mm. If the site is located on a clayey soil, with a predisposition to frosty swelling, then it is necessary to bury the columns no less than 1200 mm. The final fixation of the column in the pit is made with the help of concrete mortar and sand-gravel piling - this will be discussed later.
It is clear that the penetration of the pillars directly affects the amount of material purchased, that is, the length of the metal pipe, as well as the required volume of sand, cement and crushed stone.
3 - For strength, the support posts are best connected from above with a bridge. It is made from a tube of the same cross-section as the posts themselves.
By the way, examples are often tried when such a jumper is made along the lower boundary of the opening under the gate. Material for this will take a little - just an extra meter, well, the strength of the resulting design from such an add-on only wins. However, it turns out nails, but you quickly get used to it.
4 - Vertical frames of the frame of the door of the wicket itself are often made of a profile pipe of 40 × 25 mm - this is quite enough. From the same material, workpieces are prepared for horizontal bridges (lag) from the top and bottom of the frame (key 5), and for one or more horizontal or diagonally positioned reinforcements (key 6).
The dimensions of the workpieces are usually assumed to be equal in length and width to the door of the wicket, since the assembly most often involves joining and welding parts with an inclined at an angle of 45 degrees.
By the way, both for support racks, and for a frame of a skeleton it is quite often practiced the use of profile pipes of two different sections. It turns out "step", which can be useful and on the "box" of the wicket - in direct analogy with the conventional door frame, and on the frame itself, since it allows you to make mounting the profiled sheet in a more aesthetic frame.
7 - the sheet of corrugated board of the necessary sizes. The most commonly used models are corrugated board with a low wave, about 8 ÷ 10 mm. Thickness is desirable to use more - from 0.6 to 0.9 mm.
8 - for the hinged connection of the wicket with its "box", that is, in fact, in order for the door to open freely, usually use turned metal loops. For a wicket from a steel skeleton and a covering from proflist it will be quite enough a hinge in diameter of 30 mm.
9 - handle, which is installed as desired or if necessary.
10 - gate or latch;
11 - if there is a need to close the wicket from unauthorized entry of strangers, then a mortise lock is also installed.
Naturally, all the steel parts after welding (and some - and before they start) must be treated with anti-corrosion agents. Therefore, you will need to purchase bitumen mastic or varnish - to handle the lower part of the support posts, which will be deepened into the ground. And all external parts of the structure after the final welding and stripping should be treated with an anticorrosive primer, and then covered with weatherproof paint for external work.
Having prepared everything you need, you can go to the installation of support racks.
Installation work
Installation of gable supports
The supporting elements of the structure must be installed perfectly vertically, fixed firmly in the ground, since they will have a fairly high load on them, which they must calmly, without deformation, sustain for more than a decade.
Step-by-step illustrated instruction for installing racks
Illustration In order for the wicket to be installed exactly, in line with the entire fence, it is necessary to make a marking on the ground by pulling the cord.
If the fence on both sides of the opening for the gate and gate is already installed, then this process is easier. For this purpose, a cord is tied and pulled to the outer racks of the fence, which will indicate the line of installation of the support posts.
But, as a rule, arrangement of the fence, gates and wickets is carried out in most cases in parallel.The first step after careful marking and determining the points of installation of racks in the ground are drilled wells of the required depth.
If the recessed part of the support is 1200 mm, then the borehole must be a depth of 1500 mm, since it is additionally filled with sand and crushed stone.
When manually drilling using a garden drill, a diameter of 200 mm is usually used - this is quite enough to install a 60 × 60 mm rack. Wider, 250 - 300 mm boreholes are much harder to drill, and this is with almost no such need.
But if there is no manual drill, then the work will have to be done with a shovel. And at the same time, a wider pit can not be avoided, since it will not be possible to dig a narrow well a meter and a half deep with a shovel.In the finished wells, a sand pillow is poured onto the bottom - its thickness in a compacted state should be about 100 mm.
Above the sand is laid another 200 mm of rubble of the middle fraction.
Sealing of these layers can be done by trimming a pipe welded with a plug on one side.Further, in the prepared wells, stands are installed, the lower part of which is treated by bituminous composition 1300 mm in height.
Before installation, to ensure stability and investment leveling, it is recommended to weld a square 120 × 120 mm square cut from a 4 mm thick steel sheet onto the bottom end of the rack.Instead or in addition to such a platform on the rack, in a crosshair to it under a slight bias, two cross-members from a metal strip or corner can be fixed by welding. They are fixed at a distance of 500 mm from each other and 300 mm from the bottom edge.
Their length should be less than the diameter of the well, approximately 10 mm.
Then, after the rack is installed, crushed stone is poured into the hole, a layer 100 mm thick, and, as far as possible, is compacted.Further, the concrete mix is mixed.
It is best to apply concrete M200, made of cement, gravel and sand after its full hardening will provide reliable rigidity and stability of the structure.
Of course, when preparing the solution should be well mixed, to a homogeneous state.The ready solution is gently poured into the well, while it should be "pierced" with crowbar or steel rod, so that air bubbles do not form inside the liquid concrete, which, when solidified, will turn into shells. Such depressions can weaken the concrete base of the rack.
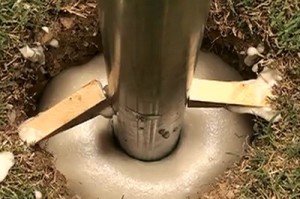
When the wells are filled with mortar, the racks are precisely aligned vertically, relative to each other and the entire fence along the building level.After removing the posts on an ideal vertical (with mandatory control in the longitudinal and transverse plane), they must be fixed in this position until the final setting of the concrete.
Fixation is done in different ways - it can be wooden wedges, as shown in the illustration, large enough stones that are installed on both sides of the counter of the rumors between the metal and the wall of the well, or supports of any materials.
Some masters prefer to fix the racks temporarily, welding in several places reinforcing bars, which abut the ground.Quite often, before pouring concrete into the concrete well, a sheet of roofing material rolled in the form of a cylinder is laid along its walls.
It turns out a kind of formwork that promotes good retention of moisture during the maturation of concrete, which positively affects the set of brand strength and durability of operation.Concrete for good grasping is required not less than 10 ÷ 15 days, depending on what the weather became on the street.
Naturally, pouring requires a certain care - during the first few days it is recommended to regularly moisturize with water.
Only after two weeks you can proceed to further work on the installation of the gate.By the way, filling the entire well with the solution, from the bottom to the top, is not always the right solution, since such forces will be strongly influenced by the forces of frost swelling of the soil. Under unfavorable conditions, it is often the case that concrete pouring is made only in the lower part of the support, at the level of freezing of the ground and below it. And the upper part after setting the concrete is tightly clogged with a sand-gravel mixture, which the forces of swelling are no longer frightening.
Another important nuance - it is not superfluous to fill the rack itself (profile pipe) with a concrete solution. This gives a powerful "increase" to the bearing capacity of the support, and in addition - the cavity of the pipe gets protection from corrosion. It is not difficult to accomplish this, concrete is also not required so much, so it is better not to ignore this question.
The two nuances mentioned above are well described in a separate article of our website.
Earlier attention was already drawn to the fact that if the frame of the wicket is planned to be made heavy, that is, for example, each of its elements will consist of two shaped pipes or the total height will be more than 2000 mm, then it is recommended to tie the support posts at the top of the crossbar. This design will be more rigid and will help a little to remove the load from the support posts. It is not forbidden to place the same jumper on the bottom.
Calculator for calculating the amount of concrete for the installation of racks and ingredients for its manufacture
The calculator below will allow you to quickly calculate how much a concrete solution of the M200 grade is required to install one stand-up gate of the wicket.
- The calculation program provides for the possibility to change the height of the concrete filling of the well.
- In addition, it is possible to include in the total amount of concrete the volume that will be required to completely fill the cavity of the pipe. If you select this option, additional data entry fields will appear. Considering the fact that different pipes can be used for the racks, the parameters of the most suitable for this purpose standard sizes of square, rectangular and round pipes are laid in the calculation algorithm.
- The answer will be given both in the total amount of concrete, and with the layout of the ingredients - cement PTS400, sand, gravel and water. The quantity of ingredients is estimated in mass and volume.
Gates and wicket from proftruby
The production of beautiful functional gates is a question that is relevant for every owner of a country house. Despite the relative simplicity of the design, the owner may have difficulty transporting the purchased product. Therefore it is much more convenient to build an entrance group on the spot and with your own hands. The construction of the gate consists of a frame and material of the doors. If the canvas can be varied, then a profile pipe is usually taken for the frame.
Proftruba - the material is quite light, the structure of it does not need a foundation. The owner can restrict himself to concreting the support pipes. The assembly of the gate is easy to do by one's own hands. Strong and reliable, they will not stand for one decade.
For their manufacture you will need:
- Pipe 50 x 50 mm for the frame;
- Proftruba 100 x 100 mm for supports;
- Pipes 40 x 20 mm for bridges, which increase the rigidity and stability of the entire structure;
- Profiled sheeting;
- Self-tapping screws;
- Primer and paint for metal;
- Lock, hinges, auxiliary materials;
- Rollers, if the sliding gate is made.
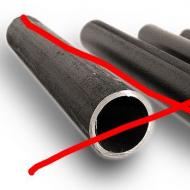
According to the shape of the section, the shaped pipes are oval, square and rectangular. More convenient in the work 2-nd and 3-rd version of the material. The square and rectangular shape reduces the metal consumption and makes the total cost of the gate budgetary.
How to weld a wicket from a profile pipe
When creating a wicket from a metal profile, it is important to consider two points:
- Convenient access to the residential building.
- Absence of depressions and holes under the future gate. Smooth surface will provide a clean dry passage without accumulation of water and dirt.
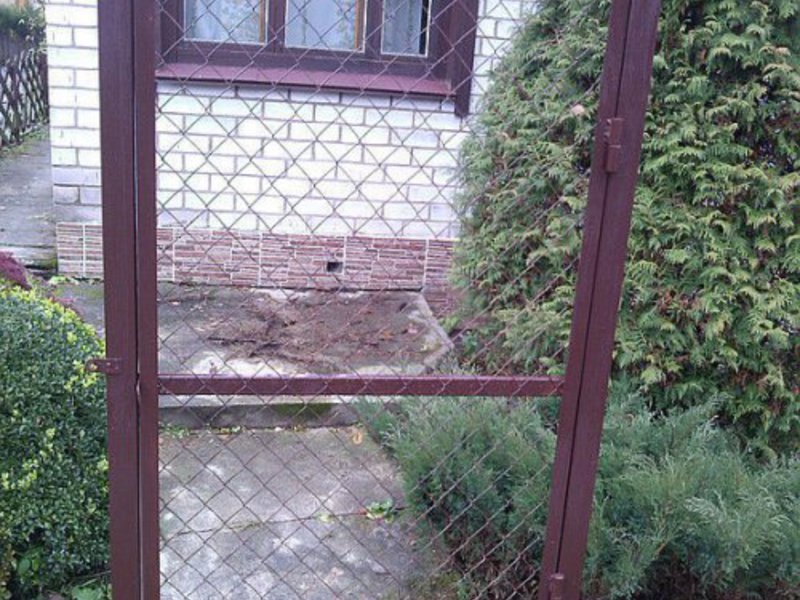
Wicket from profiled sheathing sheeting
After determining the location of the wicket, proceed to take measurements and create sketches. Work begins to lead from the finished opening. The standard wicket sizes are 1 m for width and about 2 m for height. A higher design can be created, but taking into account the negative effect of heavy construction on the lock and hinges. In order to avoid damage to these elements, it is recommended to equip the gate with the upper spacer. Load on the pillar will decrease, and the fence will last longer.
- Erection of support pillars. Using proftrub allows you to get perfectly flat racks without distortion. So that they do not sag, the depth of the bookmark is taken 1-1.5 m. The supports are poured with a solution and wait for a hardening of 10 days.
- Fabrication of the frame. Masters are advised to take a metal profiled pipe section of 60 x 30. When creating the frame, you will additionally need a Bulgarian and a welding machine. Before cutting, the pipes are cleaned, degreased and covered with an anti-corrosion compound. Then the pipes are cut according to the marks provided for in the drawing (with a 45 ° angle). With an interval of 30 cm, longitudinal parts are welded with dimensions of 1.75 - 1.90 m and 2 - 3 m. The widths take a size of at least 90 cm. They strengthen the frame and make it more original.
Canopies, a pen and a plate for the future lock are attached to the finished frame. The welding seams of the frame are cleaned and stained. The strength of the structure is increased by placing inside a smaller frame.
- Installation wicket. This work is done using self-tapping screws or rivets. Profiled sheets are fastened either on each wave, or through one. The profilist also arrives at the center of the frame (the location of the metal lintel). In the opening the wicket is placed on hinges or plastic curtains. To open the door only one way, opposite the fix the corner. Gaps and laths are lined with linen and evaluate the result of all the work.
How to weld the gates from the profile pipe correctly
The easiest way is to weld the swing gates from the factory pipe with your own hands.
- Construction work begins with the creation of a drawing and the calculation of the necessary materials. Purchased pipes are inspected for suitability. If rust is detected, it is peeled off with a Bulgarian or sandpaper. In addition, the pipes are treated with gasoline or a solvent.
- The pipes are cut, observing the symmetry of the swing gates (the cutting is carried out in pairs), and proceed to install the supports. The supporting parts are immersed in holes 50 x 50 cm in size and about 1 m deep. The pipes are installed strictly vertically, and they are poured with concrete, reinforcing the construction with rubble stone. In warm conditions the solution dries in 3 days.
- When welding pipes into a single frame, the uniformity of the angles of the structure and the diagonal of the wing elements are constantly monitored. At this stage, forged elements and locks adorn the entrance group and protect the yard from the intrusion of uninvited guests. The work is completed by removing the welding residues and grinding the product.
Collating gates
Scheme of the skin of the gate from the corrugated board to the professional pipes
To weld the hinges, which will be attached to the swing gates, it is better to draw an assistant. First, the loops are welded to the posts, then to the frame. When doing welding work, do not forget to wear special protective equipment. The paneling of the gate with a profiled sheet is carried out from inside or outside the frame. The location of the framework is made by the host taking into account the presence / absence of decoration elements forging. If they take place over the whole plane of the structure, the profiled sheet should be fastened from the inside of the frame. If there are no scenery, the canvas is screwed from the outside. The cladding material is fixed with screws and rivets.
Sliding gates from the pipe with their own hands
When installing sliding doors, it is necessary to provide an additional side space (half the size of the entire structure). It is required for mounting the rollers and laying the guide. For a long service of a recoiling structure, it is important to correctly calculate the weight, pick up materials and make a quality bookmark.
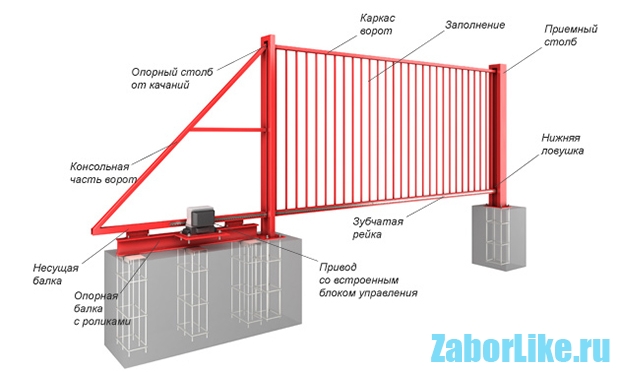
Sliding gates from profile pipe
After the creation of the drawing and the procurement of materials, the owner is engaged in equipping the foundation and installing the pillars. The supporting part is recommended to be made of 100 mm x 100 mm. On request, the rack is hidden under a brick. In general, the work is carried out in the same way as the production of swing gates.
A separate item is the installation of automation, which requires preliminary electrical wiring. The roll-off mechanism moves along the guide rail welded on the bottom, moving along the roller carriages (they must be firmly held on the foundation). Since the carriages are inside the guide, they must be protected from dirt and atmospheric precipitation.
Sheathing and decoration of sliding gates can be made from any materials. But the volume forged elements complicate the operation of the structure and sometimes make it impossible. To create the canvas master advise to use wooden boards, treated with antiseptic and varnish.
Also, the cladding can be created from a metal sheet - galvanized iron with high anticorrosive properties. The material is resistant to temperature changes and is stable in operation. Some owners prefer to work with profiled sheeting. The height of the bearing corrugated board varies from 45 to 160 mm. The embossed material can be painted and coated with a protective polymer.
What will look like your gate from the union pipe, a matter of taste. The main thing is to make a clear sketch and stock up on quality materials. And then a well-built construction will last for many years.
03.09.2016 2993
The instinct of self-preservation forces people to wall out their dwelling from uninvited guests. At the same time, the owners of the house strive to ensure that the gate with the gate looks organically and fit the surrounding environment according to the color scheme.
It is possible to make of profiled sheeting to protect your site, having elementary skills of working with a welding machine. In this there is nothing complicated, moreover - the process does not require even the presence of assistants or the availability of special lifting equipment.
Advantages of the metal profile
The wicket and profile are considered reliable and strong, thanks to the following useful characteristics of the base material:
- universality;
- smoothness of the surface;
- strength and reliability due to profiling;
- profitable price;
- light weight;
- plasticity of the material;
- durability;
- wide range of products;
- ease of installation.
Practice shows that the profile pipe can serve for about 50 years, despite the manufacturer's stated deadline of 20 years. For fences and gates use corrugated sheets with the letter C (C8, C10, C20, C21).
Out of the shortcomings of the material, a tendency to form corrosion is noted when the protective coating is damaged.
The height of the sheet from the profile should be up to 2 meters, and the optimal width - 0.5 meters. Wicket for a fence with such dimensions should not exceed the height of the fence, and in width can have 1 meter.
If there is a need for the manufacture and installation of a more powerful structure, it should be borne in mind that increasing the weight of the leaf will adversely affect the wear resistance of the object and significantly reduce its performance, leading to loosening locks or loops.
The upper insert in the wicket with a special crossbar will lower the pressure on the supporting poles and help get the canvas that closes the opening.
Installation work
If you plan to manufacture and install products from the pipe, you should stock up on the following tools: tape measure, pencil, metal scissors, screws with a 6-faced head or rivets, a handle, a lock, a loop, a drill, a bulgarian, a welding machine,
Materials will need sheets of metal profile, profile pipe 60X30, corner of steel 25X20, cement, sand and gravel, primer and paint, anticorrosive mixture.
The algorithm of work assumes fulfillment of such stages:
- Installation of two pillars.
- Work with a skeleton.
- Mounting the wicket from the profile.
All processes are important in their own way and will be considered in detail.
Mounting of support pillars
To wicket from proftrub served for a long time and without failures, it is important to properly install racks that can hold its weight.
A reliable and durable material for the support pillar is a channel or pipe. Also, the posts are made of stone or brick.
The work is done in the following order:
- First dig 2 pits (the diameter is determined depending on the thickness of the pipes). In general, the width of the pit is about 70 cm. The depth of the pit is 1/3 of the aboveground part of the rack.
- At the very bottom of the pit, rubble is compacted.
- In the bottom of each of the pillars, dense sheets of steel are welded to improve stability.
- While holding the support ideally vertically, a solution is poured into the pit from a mixture of cement, gravel or crushed stone, as well as sand.
Important! Hanging the gate on the ready support can not be earlier than 2-3 weeks after the full hardening of the mortar!
Frame
The creation of a framework is another important stage that requires attention.
You can simply and strengthen the top sheet of the profile, and you can put it inside the structure - under the corners, which greatly strengthens the gate.
The process of creating a skeleton looks like this:
- First, with the help of the Bulgarian, blanks are cut from the proftrub pipe. It is important to clean the metal from scale and corrosion, and then coat it with a mixture that prevents corrosion.
- Then the frame is assembled on the horizontal plane. Horizontal guides are laid on the vertical and welded to each other at equal intervals. Be sure to make sure that the corners remain straight, and the slats are perpendicular!
- Blanks from the corners are cut at the edges by 45 degrees and welded inside the frame. A chamfer with this angle can improve the quality of the weld, making it almost imperceptible.
- After checking the geometric smoothness of the frame, it is necessary to weld the joints of pipes and corners.
- Then the construction is put in order. To do this, all the seams are cleaned, the places of fastenings and damages are ground, and then ground and painted.
- At the final stage, locks are embedded in the frame, the handles and strong hinges for hanging the gate are installed. Frame from profile pipes is ready!
Sheathing of the frame with profiled sheet
The profiled sheet is inserted into the middle of the welded frame. If it is too big - it should be adjusted to the required dimensions with the help of a Bulgarian.
Then it is fastened by means of screws, twisting on the front side of the wicket. In the event that the screws differ sharply in color from the main material, they should be screwed from the inside, then cut off excess pieces of the Bulgarian, and at the end paint over.
Important! insert before the beginning of the lining of the frame, including work on drilling and cutting holes.
In the center of the frame of the wicket with the help of tools must weld a fixing metal bridge, which should be painted in the same color as the frame. A sheet of metal profile is tightly fastened to it so that, in strong winds, it does not vomit and does not destroy.
Installation process
In the absence of a wicket in the gate between the ground level or the road surface, leave from 10 to 30 cm.
It is necessary to install bricks (bars) of the chosen thickness between the poles, then install the gate on them and carefully align it, adhering to the pillars.
On the support and on the rack, located vertically mark the places on which the hinges intended for hanging the gate will be fixed.
Initially, the upper part of the split hinge is welded to the frame of the wicket, and then it is connected to the mating part. It is tightly welded to the surface of the column. In this case, the wicket should be in that place and in that position, as it will be permanently fixed. This installation is a rather complicated process, so at this stage it is advisable to use someone else's help.
Installation is considered finished when the wicket densely enters the loops and rises to its place, qualitatively performing the necessary functions.
Related articles