How to make a ventilation system in the kitchen. Ventilation in the kitchen: views, calculation and installation
Household men are known to strive to make every little thing in the house with their own hands to be sure of the result. They, probably, also have thought up worldly wisdom that if you want, that it has been made well, should do it itself.
Many in an effort to improve the convenience and beauty of the interior, and get to the system of kitchen ventilation.
2 Classification of the types of ventilation systems in the kitchen
When designing kitchen ventilation by one's own hands, first of all it is necessary to determine which type of hood is most suitable for the kitchen, so that the wrong choice of its type does not lead to unwanted redevelopment of the room, or a violation of the kitchen interior. Or vice versa, if your plans include a radical redevelopment and a complete change in the interior of the room - then under the new interior is not less important.
At the moment, there are several basic types of this technique:
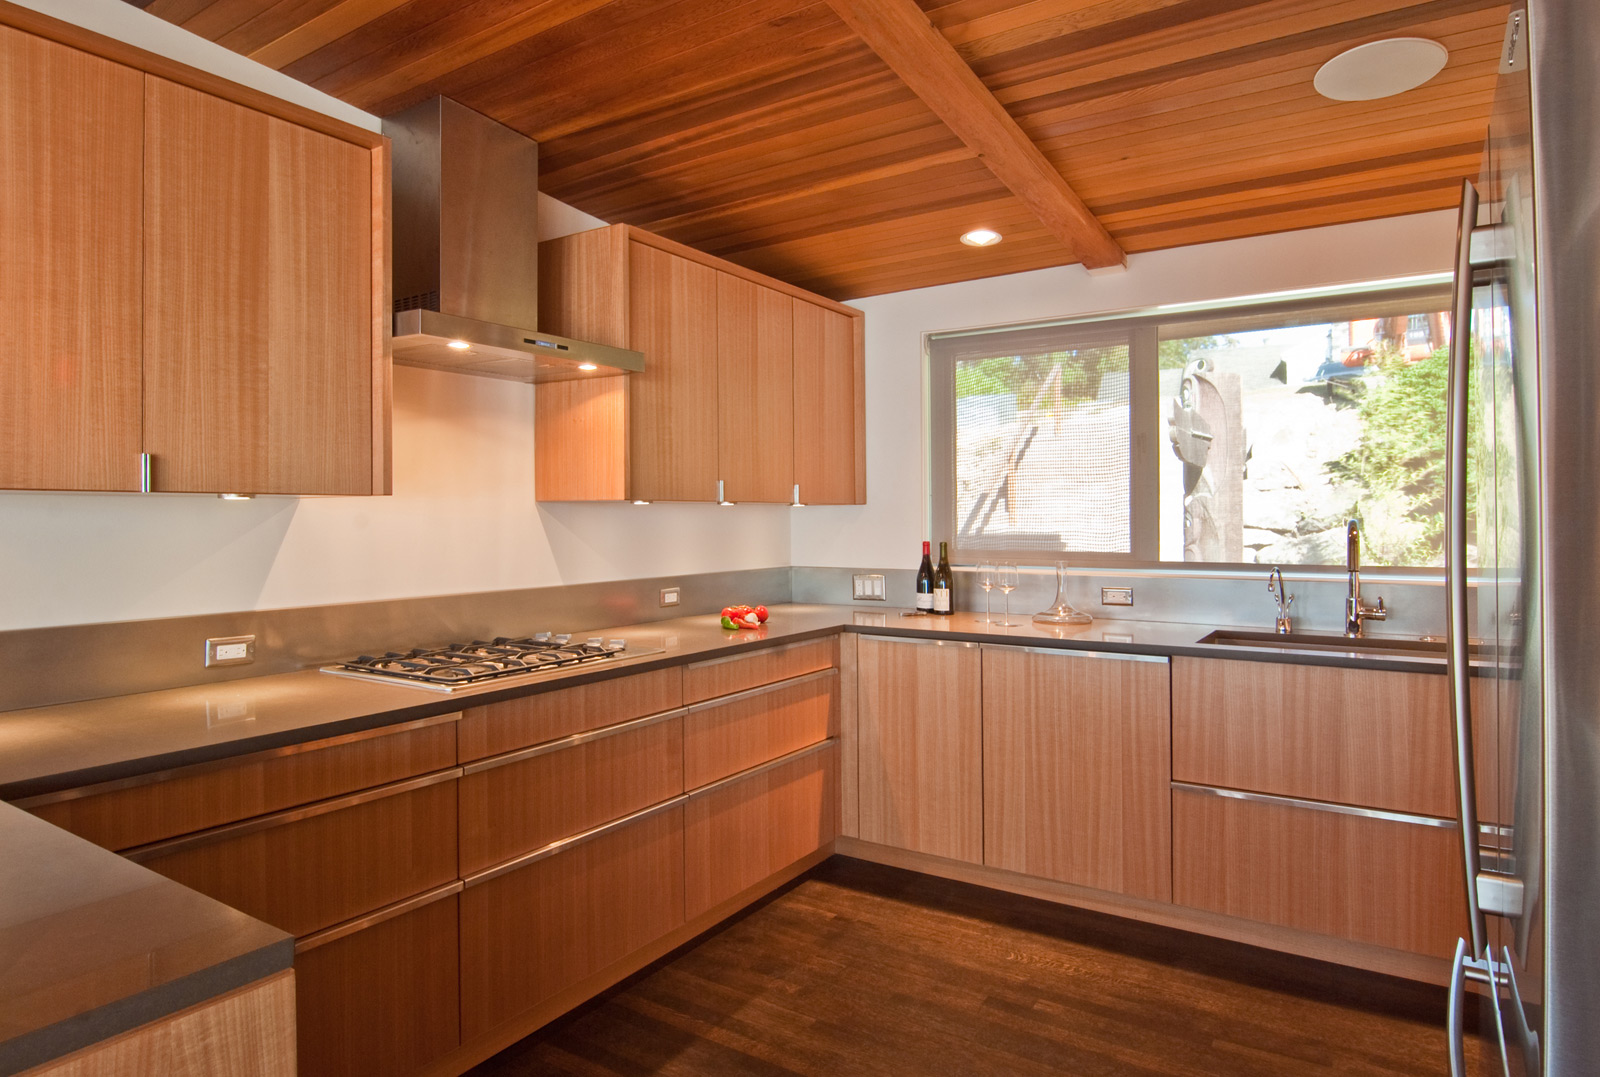
- Dome hood - the traditional and most common option. Suitable for most classical kitchens.
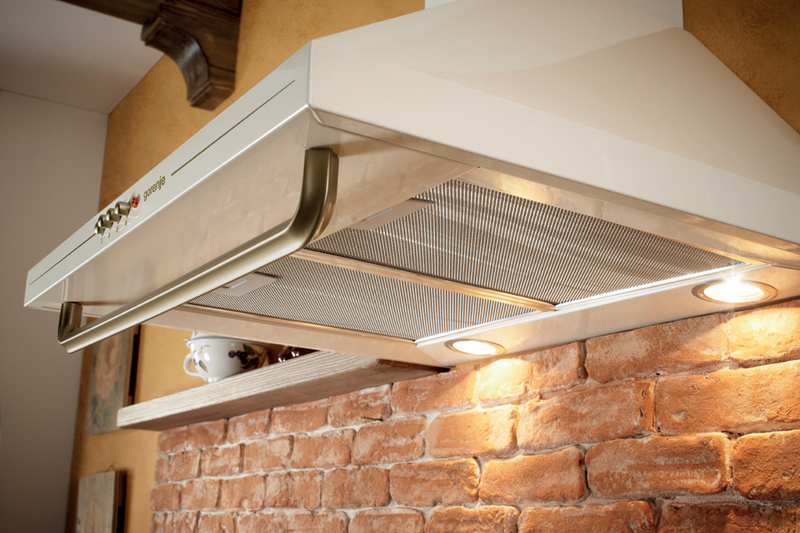
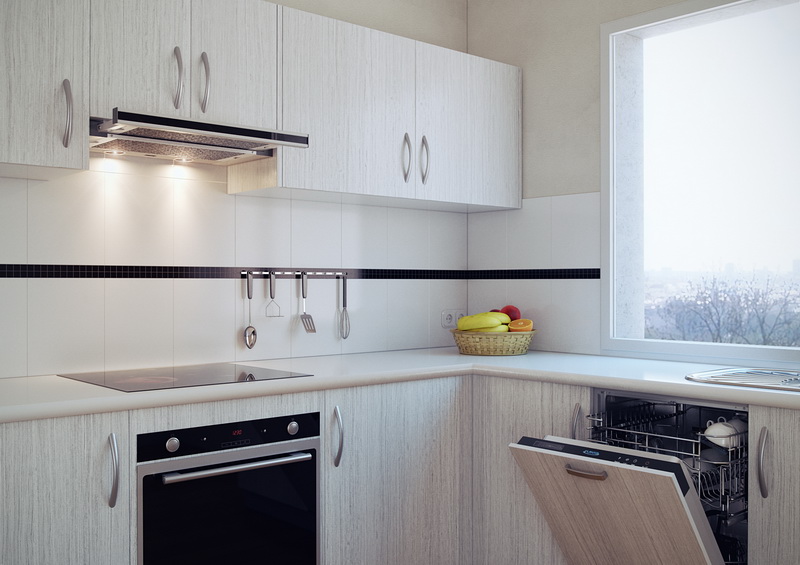
- Suspended - a flat hood, often installed between the hob and the hanging cupboard. Does not violate the general style of the interior.
- Corner hood - suitable for kitchens with a small area, in which, due to lack of space, the stove is located in the corner.
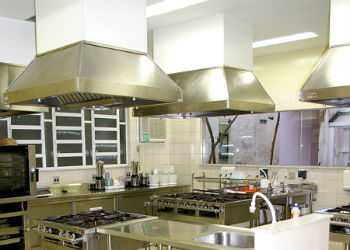
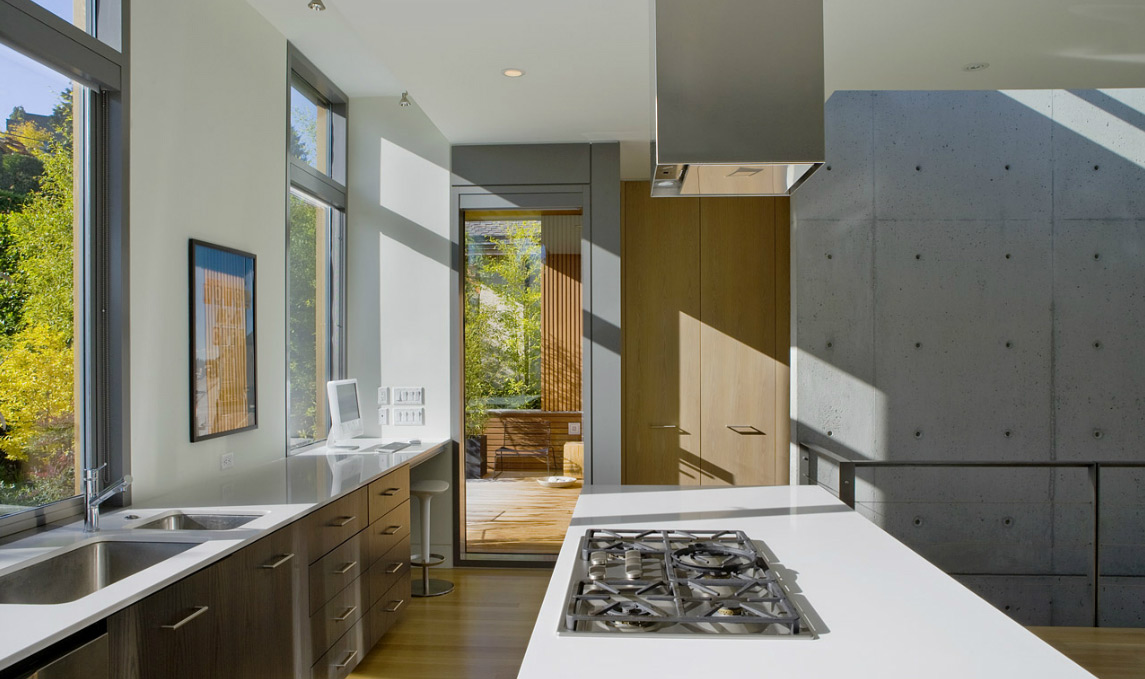
- Island hood - designed for kitchens, the area of which allows you to place the hob on a peculiar island in the middle of the room. This hood is installed to bring the interior of the room closer to the look of professional cuisine.
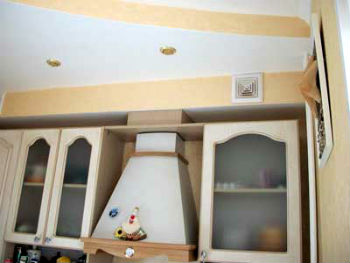
- - mounted in the cabinet, hiding from prying eyes the main part of it, as well as air ducts. An excellent option for those who do not want to violate the overall style and interior design.
Having determined what type of hood is right for you, you can start to study the intricacies of performing work on installing the ventilation system yourself.
2.1 Self-assembly and dismantling of ventilation kitchen systems
When installing the ventilation system with your own hands, it is important to initially correctly calculate the required output power. The erroneous choice of performance is fraught with the wrong operation of the entire system.
Calculating the power of the hood - the guarantee of correct operation of the system
There is a standard formula for calculating the output power: this is the volume of the room multiplied by 12. The room volume can be easily calculated by multiplying its area by the height. And the figure 12 - is the recommended standard for the number of air updates in the kitchen for one hour.
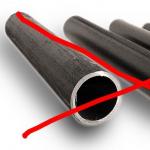
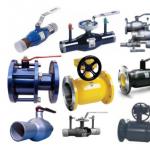
2.2 Choosing the Right Ducts for Your Ventilation System
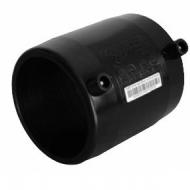
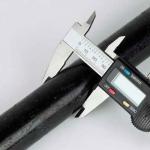
Having calculated the required output power, it is also necessary to select a pipe for connecting the extractor to the ventilation shaft, which is easy to reach by dismantling the decorative grid hiding it. Only the choice of the correct diameter and length of the pipe will ensure optimum performance of the ventilation system.
The most common options are and. The diameter of the duct should be selected based on the dimensions of the exhaust outlet of the hood. In no case should you install a smaller diameter pipe, as this will result in loss of system performance and an increased noise level during its operation.
When installing a pipe that connects the hood to the ventilation shaft, it is desirable to avoid a large number of sharp turns of the duct, as this will inevitably adversely affect the power. If you can not do without twists, it is desirable to make them smooth, with a large radius, or one bend of 90 degrees to produce in two stages of 45.
When you remove the air duct not into the ventilation shaft, but immediately to the street, the pipe outlet must be equipped with a grate, and also a check valve. while it will serve as protection against foreign objects entering the duct, and the check valve will not allow airflows to create a return draft.
The importance of proper fresh air ventilation
Unlike the times when the majority of apartment buildings were designed, and ventilation indicators were calculated, based on the capacity of wooden windows, the current apartments are mostly equipped with plastic windows that let in much less air from outside.
This should also be taken into account in the calculations, since in this case the air will start to flow from the remaining rooms of the apartment, as well as from the ventilation shaft located in the bathroom. Having got rid of one problem, we, thus, will make the following. You can avoid this by building in the external wall supply ventilation. In fact, this is a piece of pipe, through which, with the rarefaction of the atmosphere in the kitchen, air begins to flow from the outside.
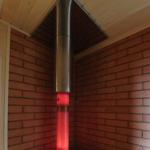
Such a system should also be equipped with a grate and a check valve, but now this valve no longer allows air from the kitchen to exit. A lattice, traditionally, protects the duct from getting debris and foreign objects. They are best positioned behind the radiator, so that the air coming from outside, had time to warm up slightly.
The diameter of the pipe should be calculated based on the drawing power, as well as the intensity of its use. In order not to complicate your task, sometimes, at low hatching power, it is enough to equip a plastic window in the kitchen with a supply valve.
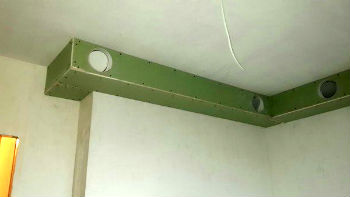
To be or not to be demolished ventilation box?
Many, when re-planning the kitchen, decide to demolish, which, in their opinion, does not bring any benefit, but only takes up the useful area of the premises. Do so in any case impossible.
This box is not only an element of the interior. He is also part of the general house ventilation system, and his demolition will inevitably lead to a malfunction of the ventilation shaft. Not only will this damage the ventilation of your apartment, so also the smells of neighboring apartments can become your constant guests.
In addition, the demolition of the box is simply prohibited, which can lead to problems, if an unauthorized redevelopment of this type is detected by the competent authorities. In addition to the penalties, you may also be required to restore the ventilation box in the kitchen.
So, if you change the layout of the room, this possibility should be discarded. Therefore, since it can not be removed, it is possible to produce its decorative finish, harmoniously inscribing it in the overall style of the interior.
2.3 Rules for the operation and prevention of ventilation kitchen systems
Proper operation is the guarantee of system efficiency
When installing and using the ventilation system in the kitchen, an important rule should be "do no harm". Intervention in the initial ventilation system in case of kitchen remodeling should be one that would improve the original air vent system, rather than reduce its performance.
As already mentioned above, when developing a draft ventilation system and redevelopment of the premises, you need to abandon the demolition of the ventilation duct, as this is fraught with negative consequences for you and your neighbors.
Incorrect selection of the drawing power also affects the performance of the ventilation system. Too little hood can not clean the air in time, and too strong for a given room volume will lead to an imbalance of air flows.
Also, one of the guarantees of long-term operation of the system is its timely prevention.
Timely prevention - as a pledge of longevity and a way to save money
It is well known that during the operation of any equipment it is better to carry out preventive maintenance in time than to subsequently carry out expensive repairs. Prevention of ventilation systems should be carried out regularly, and this is a fairly simple procedure, which can also be carried out by hand, without the involvement of specialists.
At least once a year, air ducts should be inspected and, if necessary, cleaned from soot and dust. Also, it is necessary to clean the grate located at the end of the exhaust duct, if it is pulled out. It is equally important to clean and grate the ventilation.
Prevention of the grease grate located on the hood should be carried out as contamination occurs. Sometimes grate it is enough to wash with warm soapy water, without using aggressive detergents and hard metal brushes.
Wrong choice of detergent can spoil, damaging its coating. And the frequency of replacing the carbon filter should be calculated, based on the intensity of the use of the hood.
In general, the issue of installing the ventilation system itself is wide enough, but we hope that the information presented in this article helped you to find out some of the nuances associated with this type of work. And the air ventilation system, installed by yourself, will regularly serve, pleasing its functionality and complementing the interior of the kitchen.
Kitchen ventilation is a very important cleaning system for the home. With the help of it, polluted air masses and unpleasant odors are released from the room, which are released during cooking. If you do not remove such pollution from the kitchen in a timely manner, in the future it will affect the appearance of the room and the furniture in it.
The bulk of the townsfolk, especially urban residents, often have no idea about the ventilation system, because for many kitchen hoods - this is the ventilation. This statement can be true only if a flow-through model of the hood is installed above the hob. Therefore, in the article we will consider in detail the types of ventilation in the kitchen.
Types of kitchen soiling
The most dangerous type of pollution that affects the health of the owner of the house is carbon monoxide, it is also CO. Owners of electric cooking stoves, this chemical element is not threatened, because it is released only by burning natural energy carriers: gas, wood, coal and so on.
CO (carbon monoxide) is odorless and not absorbed by activated carbon, so the recirculation type hoods are useless against it. Certainly, a greater concentration of this substance will be required, so that it can negatively affect the human body. Even in the Soviet era, standards were developed, according to which the ventilation systems in the kitchen were built. They provided a problem-free withdrawal of gas, which appeared in small quantities when burning natural fuels. Such a system guaranteed the safety of finding people in the kitchen.
Over the years, ventilation ducts overgrow, as they are never cleaned, and as a result, the efficiency of general ventilation decreases, which in turn affects the discharge of polluted air. Therefore, manufacturers of local ventilation systems offer compact devices that provide air extraction from the kitchen. The simplest option is the exhaust fan on the window. This device effectively worked and works in many apartments.
The forced system is a design, in the ducting of channels or pipes of which a special device is created, creating a pressure difference within the system. Usually his role is played by a fan.
The forced model will work much more efficiently if you choose the right fan with regard to its performance. But this criterion is not mandatory. Therefore, when it comes to safety inside the kitchen, it means natural ventilation. And if we talk about the comfort inside the room, then in mind there is a forced ventilation system.
Natural ventilation is low-power, and therefore removes a small amount of polluted air from the kitchen. But it does it all the time without stopping. The flow drawing model is more efficient and powerful in this respect, but it only works when the fan is turned on. Therefore, to ensure safety and comfort, two systems are installed at once. In addition, a flow-through hood with the outlet of the duct to the street is already considered a mandatory option for ventilation.
Advantages and disadvantages of natural ventilation
Positive characteristics of natural ventilation include:
- The removal of air does not require additional energy.
- Provision of general air extraction together with sanitary facilities.
- Quiet operation.
Negative characteristics of natural ventilation include:
- If the street is hot, then the efficiency of the system is dramatically reduced. There may be a reversal of air from the street in the room. The only way out is to ventilate in the kitchen more often.
- Can not cope with a large concentration of polluted air, especially odors. For example, if a large frying pan fry meat with onions, then the fragrance will spread throughout the apartment.
- With the withdrawal of a certain volume of contaminated air masses, the same amount of fresh air is required. Only if this condition is met will the system work efficiently.
- Over the years, the channels are polluted, which affects the efficiency of the removal of pollutants.
Rules for installing natural ventilation
Installation of ventilation in the kitchen is not easy and responsible. Residents of urban apartments are more fortunate, because in multi-storey buildings the ventilation network is initially present. But the owners of private houses in the process of construction will have to build ventilation with an extract in the kitchen.
The advantages of forced ventilation include high productivity. Even with intensive cooking, the forced system will easily cope with air purification.
A fan or a kitchen hood costs a lot of money. At their work the electric power is spent, for which it is necessary to pay. In the absence of an electric current, this system will not work.
Installation rules
It is not very difficult to install ventilation above the gas cooker in the form of a hood. The device is attached to the wall with metal dowels or studs. The main task is to connect air ducts to it, through which polluted air will be diverted to the street. Usually, problems do not arise here, because plastic ducts are fastened together by two-way couplings. If you need to make a tap, then the knee is used.
Installing the fan on the ventilation pipe, the end of which sticks out of the roof - is a complicated process. And before you make ventilation with a fan, you should familiarize yourself with some of the requirements.
- If there is a check valve in the fan design that covers the channel, and the extractor does not work, then this valve is removed. Thus, the ventilation system will operate according to the principle of natural ventilation.
- You can not mount ordinary household fans of the axial structure to the ventilation duct. They are designed to draw air, if installed horizontally. The horizontal vent pipe must not be a length.
- For a vertical system only centrifugal fans are used. They can be overhead and embedded. Of all the proposed models, these are the most expensive. Yes, and they have big dimensions.
Thus, the installation of natural and forced ventilation in the kitchen is a simple process. As practice shows, many owners of apartments and private houses cope with it independently. But to say the same about the supply-exhaust model is impossible. It's all about the complexity of the distribution of air ducts, since in this scheme two tasks are immediately pursued: the removal of polluted air and the unpleasant odors of their kitchen and bathroom, and the flow of clean air into other premises. Therefore, it is necessary to build ventilation ducts in all rooms of a private house, but one will produce a suction, and through others, on the contrary, clean air will be supplied from the street. In this case, clean air into the kitchen and bathroom will penetrate through the doors and other openings. That is, there will be a circulation of air.
But, the main thing is that this system is volatile: in its design there are fans. In addition, such ventilation systems are usually provided with an air recuperation unit. Therefore, when drawing warm air from the premises, he, passing through this block, gives part of the heat (up to 90%) to the air, which is driven into the house. Thus, the house is returned not only clean, but also warm air. And this is a big saving for heating.
The kitchen is a room in which a lot of fatty fumes and fumes are formed. In this regard, it needs special protection. This article will discuss how ventilation in the kitchen is done by hand.
Types of hoods for kitchen
- Built-in. They are installed inside the cabinets or in the table. Thanks to this, they perfectly fit into any interiors.
- Suspended (they are also called standard or flat). They are fastened between the stove and the hanging cupboard. To date, this is the most common form of hoods.
- The wall. Install on the wall above the tile. They can have a very different design, you can see this by viewing various thematic photos presented on our portal.
- Corner. Are fixed in the corners.
- Island. Served for use in kitchens with an island. They can be installed in any room, as they are suspended from the ceiling.
By the method of work
In addition to the fixing method, the hoods are divided according to the type of work:
- Flowing. Their principle of operation is to draw the polluted air into the ventilation shaft (it is also called air discharge). On the assurances of professionals, this method is the most effective.
- Circulation hoods. They pass air through special carbon filters that give fresh air to the outlet. As the instruction says, they do not need to create an air duct, but this affects the efficiency of the device.
Calculation of required power
So, the conventional formula for calculating the required power is as follows:
P (power) = S (room area) * h (height) * 12
To get the most objective figure, the result is added to 30%. This is due to power losses due to the curved shape of the duct.
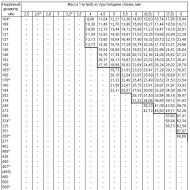
| Kitchen area, m2 | Ceiling height, m | Required power m3 / h |
| 6 | 2,5 | 234 |
| 9 | 2,5 | 351 |
| 12 | 2,5 | 468 |
| 12 | 3 | 561 |
| 15 | 2,5 | 701 |
Table 1: minimum power for kitchens of standard sizes
Tip: When buying this unit, you should also take into account the level of noise emitted during operation. The acceptable limit is 50 dB. Models that produce a higher noise level will bring discomfort to the home.
Grounding
Before you begin the story of how to make ventilation in the kitchen, mention should be made of electrical safety measures. The fact is that the device regularly gets into the device splashes of grease and moisture, which increases the chance of a short circuit.
In this connection, the hood must be connected to the network by three wires: earth, phase and zero. The grounding cable must be yellow with a green stripe. Before installing the exhaust equipment it is required to make a good grounding.
If the apartment has a ground loop and provides a euro outlet, then no problems arise. It is enough to connect the wire to the ground terminal (it is indicated by the word Ground (GND)). If there is no such connector, you can do it yourself by screwing the cable to the case.
However, it may be that the apartment does not have euro-sockets and, as a consequence, grounding. In this case, it is required to perform the zeroing yourself. So, the procedure should be carried out as follows:
- Open the electric shield (in the entrance) and find there a zero bus.
Important! Be extremely careful, because the wires are under voltage of 220 volts. Wear special rubber gloves.
- Most likely, on it you will find a ready-made pin, on which zero wires are laid. This is the very dead neutral and, hence, the pipe is qualitatively grounded.
- From it, you need to conduct a multicore wire with a cross-section of at least 2.5 mm2 to the kitchen.
- The hood must be connected via a 6, 3 ampere separating machine.
Very important! If any wires are already connected to the earthing, they can not be switched off, as this may result in a current shock or a short circuit. Their wires will need to be thrown over them, tightening the nut.
Mounting the hood
Of course, the ventilation device in the kitchen can be different, and the installation process will be different. It is impossible to foresee everything, therefore we will consider this operation using the example of a built-in flow-through hood built into the cabinet. The choice fell on this particular variety due to its wide popularity.
Anti-reversion mechanism
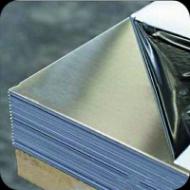
In order to make a really high-quality and efficient ventilation system, you need to start by erecting a box for the cracker. It can be made independently of their tinplate, galvanized sheet or aluminum. To do this, you just need to take four sheets of metal and connect them with screws (their version should be selected depending on the material selected).
However, you can make it easier and purchase an anti-return valve. This device is mounted in front of the ventilation shaft and opens like a butterfly. But still in this article we will consider a more thorny path.
- For convenience, the cabinet is first placed on a wall cabinet. Then it is fixed more tightly to the cabinet and all the cracks are closed with the help of mounting foam.
- First of all, you just need to try on the case of the cracker and make a marking on the cabinet to make holes.
- After that, you need to remove the cabinet from the wall and cut the hole in the bottom wall with an electric jigsaw for the lower frame. To do this, first drill a hole inside the marking area with a large drill. Then, a saw of the jig saw is inserted into this hole and the desired shape is cut in the cabinet.
- It is better to use foreign instruments, despite the fact that their price is much higher (in their quality they are at times superior to domestic counterparts). Further, in the same way, holes are made in the inner shelves for the duct. Thus it is necessary to leave a stock of 3-5 mm.
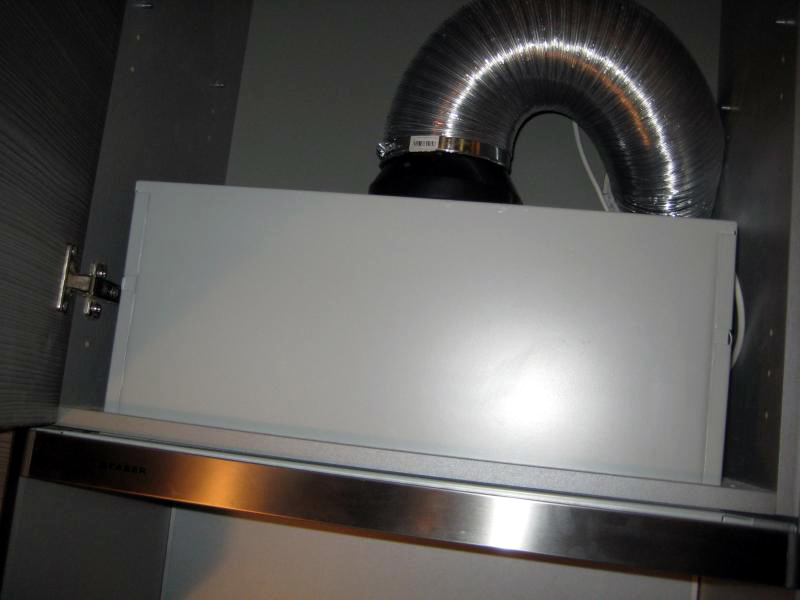
Duct connection
- In the holes made, you need to insert the corrugation. In the upper wall of the cabinet it needs to be shaped like a square.
- After that, the corrugation should be cut off, leaving a small margin, cut the corners and bend them outward.
- Then you can hang the cabinet with the corrugation on the wall. Do not forget about the processing of all joints of the duct sealant, in order to avoid power loss.
- The next step is to fix the box to the cabinet to ensure that the corrugation is connected to the ventilation shaft. It can also be applied to silicone by covering large slits with mounting foam.
- Now you can fix the hood in the cabinet, screwed it with screws. Further it is required to fix the corrugation to the hood as much as possible and fix it with a clamp.
- If the hood is connected directly, then simply connect the air duct to the ventilation shaft. To facilitate this procedure, you can use a grate with a round hole.
The kitchen is a room exposed to strong steam, grease, soot and high temperatures. Cooking here is accompanied by sharp smells, spreading throughout the apartment. To avoid this, install hoods of different types. Remember, only experts know how to make ventilation in the kitchen efficient and qualitative, dividing it yourself, you risk the exact opposite result. The most effective is a mixed type of ventilation, which includes the correct natural air exchange and exhaust operation. Therefore, you will learn in this article how to make mixed ventilation in the kitchen.
The design of the ventilation system must begin with the calculation of the power of the future drawing, its type and method of installation. When calculating the power, two parameters must be taken into account:
- Kitchen area
- Ceiling height
Multiplying these figures and multiplying their work by 12, you get the approximate power of the necessary equipment. Hence it can be concluded that with ventilation of a small kitchen can handle and extracting a small capacity, but for spacious premises it is better to purchase a more efficient exhaust system.
All kitchen hoods are of two types:
1 suspended - installed directly above the gas stove;
2 built-in - located inside the cabinets, so easily adaptable to the design of any kitchen.
Suspended exhaust ventilation can also differ by the installation method. It is mounted:
- on the wall above the stove (wall hood) - can be of different shapes and uses different methods of work
- in the corner of the kitchen - corner. Are you interested in how to make angular ventilation in the kitchen? The installation method is similar to the wall
- in any part of the room - island (fixed not on the wall, but on the ceiling, so suitable for kitchens with a central location of the plate)
According to the method of operation, the listed systems can be:
1 Circulating - do not connect to the ventilation shaft. Air purification with their help is due to replaceable carbon filters. Such equipment requires regular costs for the replacement of filters and constant monitoring of their condition. If you forget to replace the cartridge in time, your hood will not be able to fully perform its functions to clean the air in the room. 2 Flowing - connected to the ventilation shaft and are more reliable, economical and functional equipment, compared with the previous version.Whatever the ventilation system you have chosen, regardless of the design or installation method, only proper installation ensures a good result.
How to organize ventilation in the kitchen
The process of ventilation is based on the withdrawal of soiled by soot, steam and odors, air and replacing it with a new one. When a correctly designed system is operating, the fresh air flow must equal the outflow of the old one. Therefore, to achieve the desired efficiency, it is not enough to buy equipment and install it in the proper place.
You should take into account that originally forced-type ventilation systems were designed for rooms with wooden windows. Such windows easily pass air, and so with the influx of necessary cubic meters there are no problems. But in modern buildings everywhere are installed sealed metal-plastic windows, preventing the air flow into the room.
You turn on the hood, and it actively starts pumping out the air in the kitchen, creating a rarefied atmosphere. And since it is known that air flows easily flow from zones with higher pressure to zones with low, in a few minutes the atmosphere from your apartment will be pumped out through the ventilation shaft. But that is not all. In each apartment there are at least two air ducts. One is in the kitchen (our hood is connected to it), and one or two are located in the bathroom zone.
When all the air reserves in your apartment are exhausted, the remaining free mines will join the ventilation system. Through them, your home will start to receive air from outside, replenishing the missing cubic meters. This would not be a problem if only fresh air flows from the street were pumped through the pipe. However, not only your home is connected to the ventilation shaft. It comes out air ducts from the apartments of neighbors located above and below your apartment. And the more floors in the house, the more such ducts will be in the ventilation system. Accordingly, air flows will come from neighbors' apartments, bringing with them new unwanted odors.
Hence it follows that the installation of ventilation should be accompanied by correct calculations of air exchange in the room and installation of an additional air duct in the kitchen. Optimum ways of arrangement of the duct:
- Connect the hood above the opening of the ventilation shaft. The exhaust pipe must be charged directly into the shaft and directed with a turn upwards. If you follow this rule, the flows will not mix, and the airflow can be carried out below its outflow.
- Addition of grating by non-return valve. In this case, the hood pipe does not have to be charged directly into the shaft. When the system is shut down, the valve will be permanently open.
- Installation of supply valves in the outer wall. You can install these valves on any wall facing the street, but it is better to place them directly behind the radiator. The air coming from the outside can immediately heat up, passing through the radiator, so you will avoid a perceptible difference in temperatures and drafts in your kitchen.
Only correctly drawn up scheme of the ventilation system allows to fully exploit both electric hoods and natural ways of ventilating the room.
Installing the hood with your own hands
The kitchen ventilation system can be very different, that's why the installation process is also different. Now you will learn how to organize ventilation in the kitchen with your own hands using the example of a flow-through hood, built into the cabinet. We chose this type, because it is the most common.
I stage - installation of anti-return valve
To make a reliable ventilation system, start the installation with the installation of the cork for the cracker. You can make it at home using tin, galvanized sheet or aluminum. All you need to do is take 4 metal sheets and connect them with screws.
But if you do not want to mess around, you can just buy an anti-return valve in the store. It is installed in front of the ventilation shaft and opens like a butterfly flies. And yet in this article you will learn in detail how to make ventilation in the kitchen:
- For you to work comfortably, place the valve body on the wall cabinet. Then secure it tightly to the cabinet and fill all the slots with mounting foam.
- Try on the case of the firecracker and mark the cabinet for the holes.
- Next, remove the cabinet from the wall and using an electric jigsaw cut into the bottom wall a hole for the lower frame. First of all, drill a hole with a large drill inside the marking area. After that, insert the saw into the resulting hole of the jigsaw and cut out the hole of the desired shape.
- Work to perform better imported tools, if quality is important for you. By the same principle, make holes in the shelves in which the air duct is located. And leave a margin of 3-5 mm.
II stage - air duct connection
After installing the anti-return valve we will tell you how to make a conclusion in the ventilation in the kitchen. The duct is connected in this way:
- In the drilled holes, insert the corrugation. Push the corrugation through the top wall of the cabinet, give it a rectangular shape.
- Trim the corrugation so that the stock remains. Incline the corners and bend them outwards.
- Now you can hang the cabinet with the corrugation on the wall. Do not forget to treat the joints of the duct sealant, so as not to lose the exhaust power.
- At the next step, fix the box to the cabinet, which provides the connection of the corrugation and the ventilation shaft. You can also put the box on the silicone, while covering the large cracks with foam.
- Then fix the hood in the cabinet with the help of self-tapping screws.
- Corrugate very firmly attach to the hood and fix it with a clamp.
These rules for installing ventilation in the kitchen will help you return clean and neat air to the room, which is pleasant to breathe!
Features of natural air exchange in the kitchen
With not too active use of the kitchen, you can only manage the natural air exchange, but it is better to accelerate the outflow of air through the ventilation shaft. To do this, you must improve the ventilation in the kitchen, that is, upgrade the mine with a special fan. Such a fan is built right into the vent, the power is calculated based on the volume of the kitchen.
As with exhaust hoods, the fan pumps out polluted air from the kitchen, so you should take care of an additional supply, especially if you have a kitchen with a gas stove. Fire quickly burns oxygen, dilutes air and lowers atmospheric pressure. In order to ensure a sufficient air supply, it is possible to use supply valves in the outer wall, as in the case of forced exhaust ventilation. But you must remember that the main goal is to achieve a balance in the calculation of air exchange in your apartment.
Heavy, unsuitable air, entails the appearance of many diseases. Therefore, a quality ventilation system is a guarantee of health and the best way to get rid of your unpleasant smells. But you now know how to make ventilation in the kitchen and solve this problem!
Did you like the material? Thank the likes.
During cooking and washing dishes, heat, odors and moisture are released into the kitchen. If the kitchen ventilation does not work, they are distributed to the living quarters. What kind of comfort can we talk about, if in the house there are always scents of borsch and cutlets!
And the owners ask themselves "how to make ventilation in the kitchen in the apartment?".
The subtleties of the work of kitchen ventilation
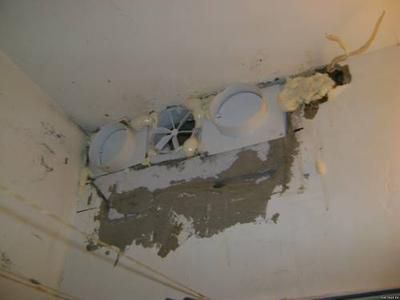
Before you make a quality ventilation system in the kitchen in the apartment, it is important to understand the principle of its operation. Most of the old houses were rented with ventilation holes in the kitchen - mandatory components of the air exchange system by type of highway and satellites. From the apartment-"satellites" air is collected in a common highway and out. With such a scheme of ventilation of kitchens, it is impossible to penetrate the air from the mine into the apartment, getting it from one apartment to another, including during a fire on the lower floors. The mine for kitchen ventilation hides in the ledge shown in the photo above.
Features of ventilation of apartment buildings:
- Air channels (air ducts) from kitchens of different apartments are interconnected;
- At an hour from one apartment should be removed from 60 to 90 cubic meters of air.
The basic law of air exchange is a circuit. To exhaust air stretched out onto the street, it must be replaced by fresh air. But most owners of high-rise buildings have already replaced the old wooden windows with plastic ones, creating a hermetic construction, completely blocking the clean air to the apartment.
The hosts believe that solving the problem in more frequent airing. But this is a mistake. A healthy microclimate can provide only a constant and controlled air exchange.
Open in winter, the windows lead to sudden temperature changes in the apartment, drafts. In this case, the outflow of air through the ventilation ducts (if they are not clogged) is possible only with open windows.
In the rest of the time, residents suffer from:
- high humidity;
- lack of oxygen;
- elevated levels of carbon dioxide;
- development of mold;
- spreading the smells of cooked food throughout the apartment.
So, in order for ventilation in your kitchen to work perfectly, you need to provide only two conditions:
- the influx of fresh air;
- blowing out the exhaust air.
Now make ventilation in the kitchen with your own hands for you will not be difficult. The work on the restoration of kitchen ventilation should begin with a diagnosis.
Checking of general ventilation
Restore ventilation in the kitchen in some cases you can yourself. A common ventilation system is in every house, but often it does not work at all.
How to check ventilation in the kitchen:
- Take a piece of thin paper with a palm sized and attach to the ventilation grille. If it is held and does not fall - it means that the ventilation in the kitchen is working, and you are worrying in vain;
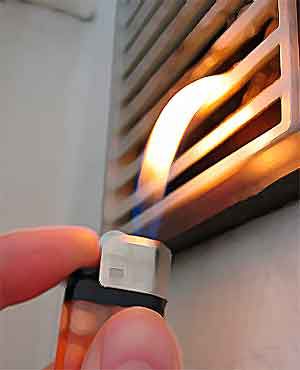
- Light a match and bring it to the grate. If the tongue of flame is drawn into the ventilation duct, then everything is in order with the kitchen ventilation. Check ventilation in the kitchen in the photo. When the tongue is held vertically, the kitchen ventilation does not work. And if the flame is tilted into the kitchen, it means that the ventilation system has a reverse thrust. This method is never used by professionals, since flammable gases can accumulate in the ventilation ducts.

A safe method for checking ventilation in the kitchen is shown in the photo.
If ventilation in the kitchen does not work, you can remove the grate, rinse it (sometimes it is so stuffed with dust and fat that it does not let in air). Then insert into the vent in the kitchen a brush on the long handle and clean the air duct as far as you can get.
Clean out the whole ventilation shaft from the kitchen to the residents and it is absolutely forbidden to restore it independently. This is the work of the management company. Called specialists with equipment and skills. Sometimes it is enough to remove the bird's nest from the vent and the thrust in the kitchen magically appears.
But it happens that the neighbors simply dismantle their part of the ledge for ventilation in the kitchen to get extra space for the pantry. Then you have to build ventilation in the kitchen with your own hands.
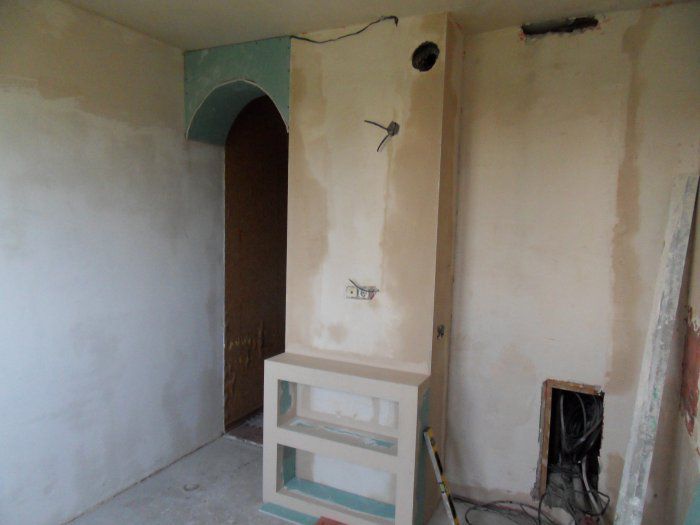
the mine is zadekorirovana under the bookcase
A reasonable solution for decorating the ledge for ventilation of the kitchen in the photo.
Good furniture hides the flaws of the kitchen with a ledge for ventilation in the photo.
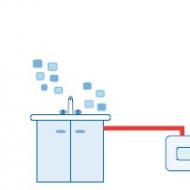
How to ensure the flow of air in the apartment
The supply of fresh outdoor air to the apartment for ventilation of the kitchen can be arranged in two ways:
- window intake devices;
- wall air supply devices.
Installation of the window valve will have to be entrusted to specialists. And the installation of the wall supply valve is within the power of any home master.
Window ventilation ventilation valve
These are simple and inexpensive devices, which today are an indispensable element of ventilation schemes for modern kitchens. The valve provides a normative flow of air, delaying street noise.
The inlet valves are installed on the window leaf or frame. The window in the kitchen in the apartment, furnished, will never fog. A neat and small valve is practically invisible, does not let dust pass and does not cause air cooling.
You can not just make ventilation in the kitchen, but also provide it with such a technical "bells and whistles" as the hydraulic regulation of the inflow. On sale there are supply valves with this function. They open and start airing exactly when soup is cooked in the kitchen or pies are baked, that is, the humidity of the air is increased. The sensor reacts to the humidity level and changes the cross section.
To the valve, you can purchase an additional acoustic visor that absorbs street noise.
A wide range of inlet valves allows you to choose suitable for any window profile: white, black, under oak or teak.
But in order for the supply valve to perform its function qualitatively, it is necessary to ensure the outflow of air from the kitchen.
Wall supply ventilation valve
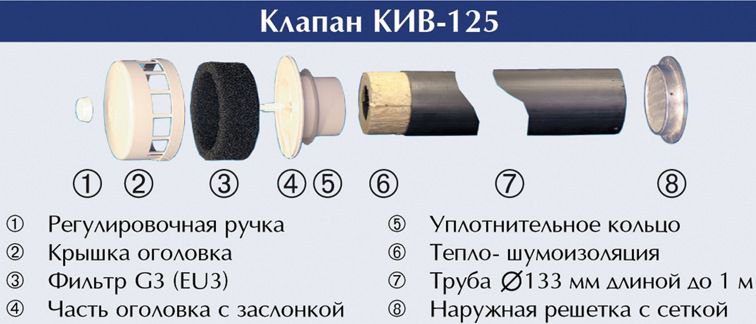
Wall inlet valves are also called "Finnish windows". This is a small device, to install which is quite simple, but without it, the correct organization of ventilation in the kitchen is impossible. The wall valve lets air into the room, detaining insects, dust and drafts.
The advantage of wall valves in a simple installation. Do not need to call a wizard, spoil the plastic profile of the windows.
Other advantages of wall valves:
- does not use electricity;
- absorbs noise;
- has a small size and nice design;
- easy and quick to assemble.
There are wall valves with air filtration and automatic air supply, based on hydro-regulation. The intensity of the air supply can be adjusted manually, by closing or opening the shutter.
Once in 6 - 12 months, it is necessary to clean the filters, rinsing them with warm water.
Installing the wall inlet valve
Before installing the vent valve in the apartment, you need to pick up a suitable place in the kitchen. It is better that the valve is not too conspicuous. Many choose a place near the radiators. The air coming from the valve will be preheated. The main criterion for choosing a location is the availability of access to the street for fresh air:
- In the wall is made a hole a little larger in diameter than the valve tube. A small supply is necessary for the correct positioning of the pipe;
- The pipe is inserted into the vent in the kitchen. The cracks between it and the wall are frosted;
- Cut off an extra piece of pipe (it is usually sold in a standard length of 1 m). From the outside, the pipe should be flush with the wall surface, and within it, protrude no more than 1 cm;
- In the previously marked places, holes are made for the fastening of the housing;
- Filters are inserted (if provided by the design), and an external grille is installed;
- From the side of the street, a rain guard is hung, preventing moisture from entering the interior. If you drill a hole with a slope toward the street, the rake is not needed.
The correct organization of passive supply ventilation in the kitchen is possible if air is drained.
How to ensure the outflow of air in the apartment
If the general ventilation system in the kitchen does not work, you can organize the outflow of air on your own using mechanical traction.
Exhaust Ventilation Fan
Very simple and effective means when the exhaust ventilation system in the kitchen does not work. The fan can be used alone, as well as in addition to the kitchen hood. Many experts recommend installing a hood with air recirculation (a filter that cleans the air and feeding it back into the room) and a fan to the output of the kitchen air duct with your own hands.
Usually, the correct ventilation of the kitchen uses axial fans.
When choosing a model for ventilation of the kitchen in an apartment the following parameters are taken into account:
- power is determined by the formula: kitchen area * ceiling height * 10. Here 10 is the air exchange rate per hour;
- published noise - from 40 to 70 decibels;
- safety (work with hot air). There are models that can withstand up to 120 degrees;
- presence of fatty filters;
- presence of humidity sensors. Switched on and off in automatic mode.
Before you properly make ventilation in the kitchen using an exhaust fan, you need to choose a place to install it. It can be a window, a vent in the kitchen wall or a ventilation duct.
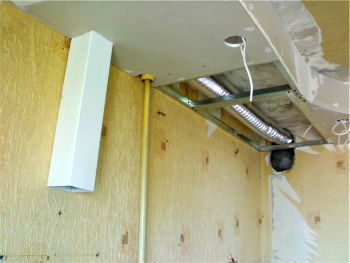
An example of the installation of mechanisms for ventilation of the kitchen in the photo.
Kitchen exhaust ventilation
Most apartment owners resort to this method. It is really effective, since the hood is located directly above the hob and immediately evacuates the vapors and odors. From the hood ventkanal is released directly into the general ventilation. And then you must certainly observe one rule:
Put the pipe into the shaft, do not block it.
On sale there are special ventilation grilles with two outputs: for natural air movement and for the exhaust pipe. This decision is the most correct.
The vapors and warm air in the room rise upwards and to leave the vapor cloud evacuated, leave the grill open. Through it, the exhaust air of the living quarters is also removed.
Overlapping the grill, you completely violate the work of natural ventilation. The employees of the gas service will point out this error and will order it to be rectified as soon as possible.
It is important to choose the right hood. Its dimensions and power should be adequate to the room. Thus, the most effective extraction, the umbrella of which is equal to the area of the hob.
The weakest cooker hoods work with a capacity of 250-300 cubic meters of air per hour. The most powerful are 1200 cubic meters of air per hour. An excessively powerful appliance in the kitchen can disrupt the air circulation in the general house ventilation scheme, calculated on an average of 75 cubic meters of air per hour from one apartment. In the system of kitchen ventilation, air pumping is created, pushing "your" smells into the neighboring apartments.
Therefore, the productivity is calculated by the formula:
The area of the kitchen is multiplied by 10.
For the effective and safe operation of the hood as an element of the ventilation scheme of the kitchen, it is important to install it correctly. The closer the umbrella to the hob, the less heat and aromas of the kitchen will spread around. But too low installed, the hood can interfere with cooking and even melt away from the temperature.
The optimum height of the hood installation is 55 - 56 cm above the stove.
In addition to the above described ventilation schemes of the kitchen, there are still supply and exhaust equipment providing maximum comfort. But it is quite cumbersome and expensive, so when equipping kitchens apartment buildings are usually not used.
Related articles